
Equipment, Materials and Documents
Manual — Projects · chapter 10 of 13
Three tabs take care of what comes in and goes out of the job site or installation: the rented machines (Equipment), the materials requested from the warehouse (Materials) and the project files (Documents).Equipment
Section titled “Equipment”The Equipment tab controls machines and equipment rented or mobilized for the project — excavator, aerial work platform, temporary generator, crane —, with daily rate, driver and checklists for entry, daily use and exit. They are not the company’s registered assets (those are mobilized through the app, chapter 11).
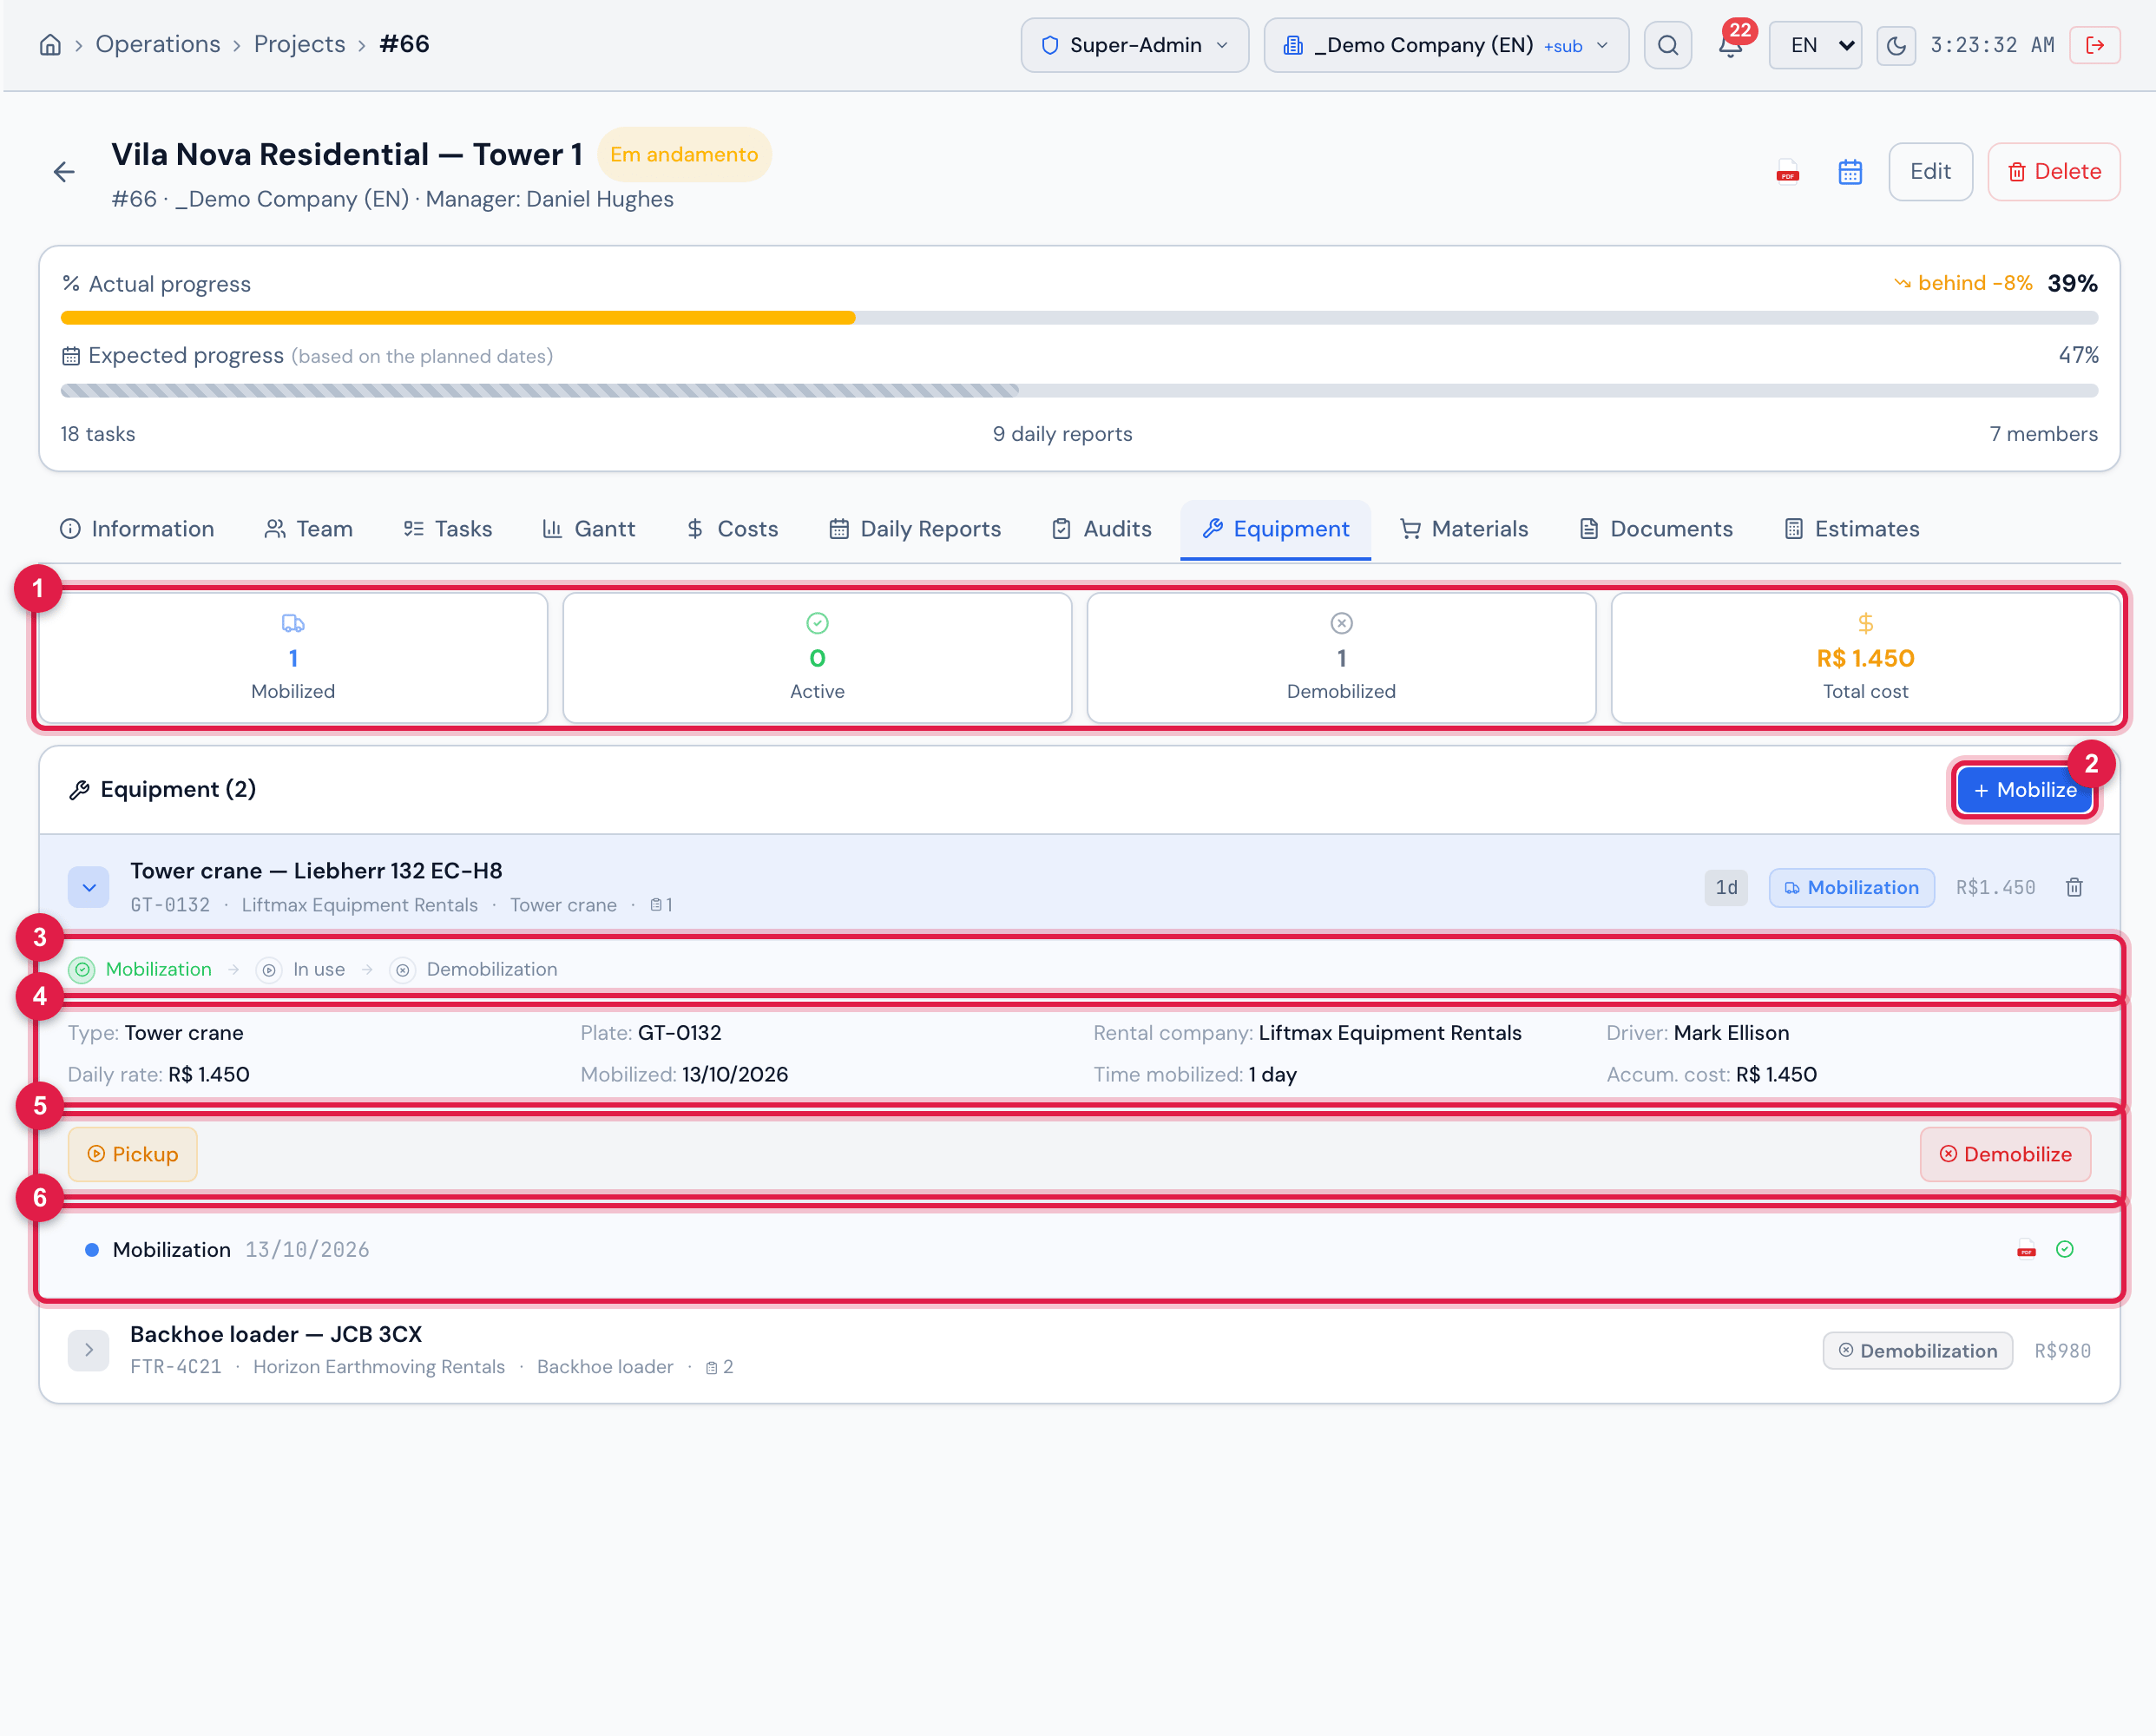
Figure 21. Equipment tab: the cards that filter the list, the Tower crane — Liebherr 132 EC-H8 (mobilized) expanded with its stages, data, actions and the mobilization checklist already executed, and the Backhoe loader — JCB 3CX (demobilized) in the list. The list search only appears when the project has more than three pieces of equipment.
- 1Mobilized, Active and Demobilized cards — click to filter; Total cost adds up the accumulated cost of the equipment.
- 2Mobilize — registers a new piece of equipment. It needs the Create right in Projects.
- 3The stages of the equipment, from mobilization to demobilization.
- 4Data: type, plate, rental company, driver, daily rate, mobilization date (Mobilized), Time mobilized and Accum. cost.
- 5The buttons of the stage — here Pickup and Demobilize. Before mobilization, Mobilization Checklist appears; with a pickup open, Return.
- 6The executed checklists, each with its PDF.
| Mobilize field | What it is for |
|---|---|
| Name | required. E.g. “Excavator CAT 320”, “500 kVA generator — rental”. |
| Plate / Serial | the vehicle plate or the serial number. |
| Rental company | who rented it out. |
| Type | free text (excavator, platform, generator). |
| Daily Rate | the amount per day; H2O multiplies it by the calendar days from mobilization to demobilization (or until today, while the equipment is mobilized) in the Accum. cost and in the Total cost. |
| Default driver | the usual operator. |
| Checklist templates | optional: the Mobilization, Daily (the one for each pickup) and Demobilization checklists. The list shows the templates with Template type = Equipment (Knowledge › Templates). |
- Mobilize: fill in the data and, if you use checklists, choose the templates in Checklist templates.
- On arrival, Mobilization Checklist — the entry inspection.
- At each use, Pickup: enter the Driver and click Start; answer the daily checklist. At the end of use, Return. An unfinished pickup appears as Continue Pickup.
- When it leaves the site, Demobilize and confirm. The equipment moves to Demobilized.
- The Pickup and Return buttons only appear when the equipment has the Daily template; Mobilization Checklist, when it has the Mobilization template.
- Opening a checklist (mobilization, pickup, return) needs Create in Projects; answering and demobilizing, Edit.
- The trash can deletes the equipment while it has not been demobilized (Trash in Projects). Once demobilized, it stays as history.
- In the app, the project’s Equipment tab does the same entry, pickup, return and exit (chapter 11).
Materials
Section titled “Materials”The Materials tab gathers the Material Requests made for the project: the request to the site’s warehouse, which goes on to purchasing when there is not enough stock.
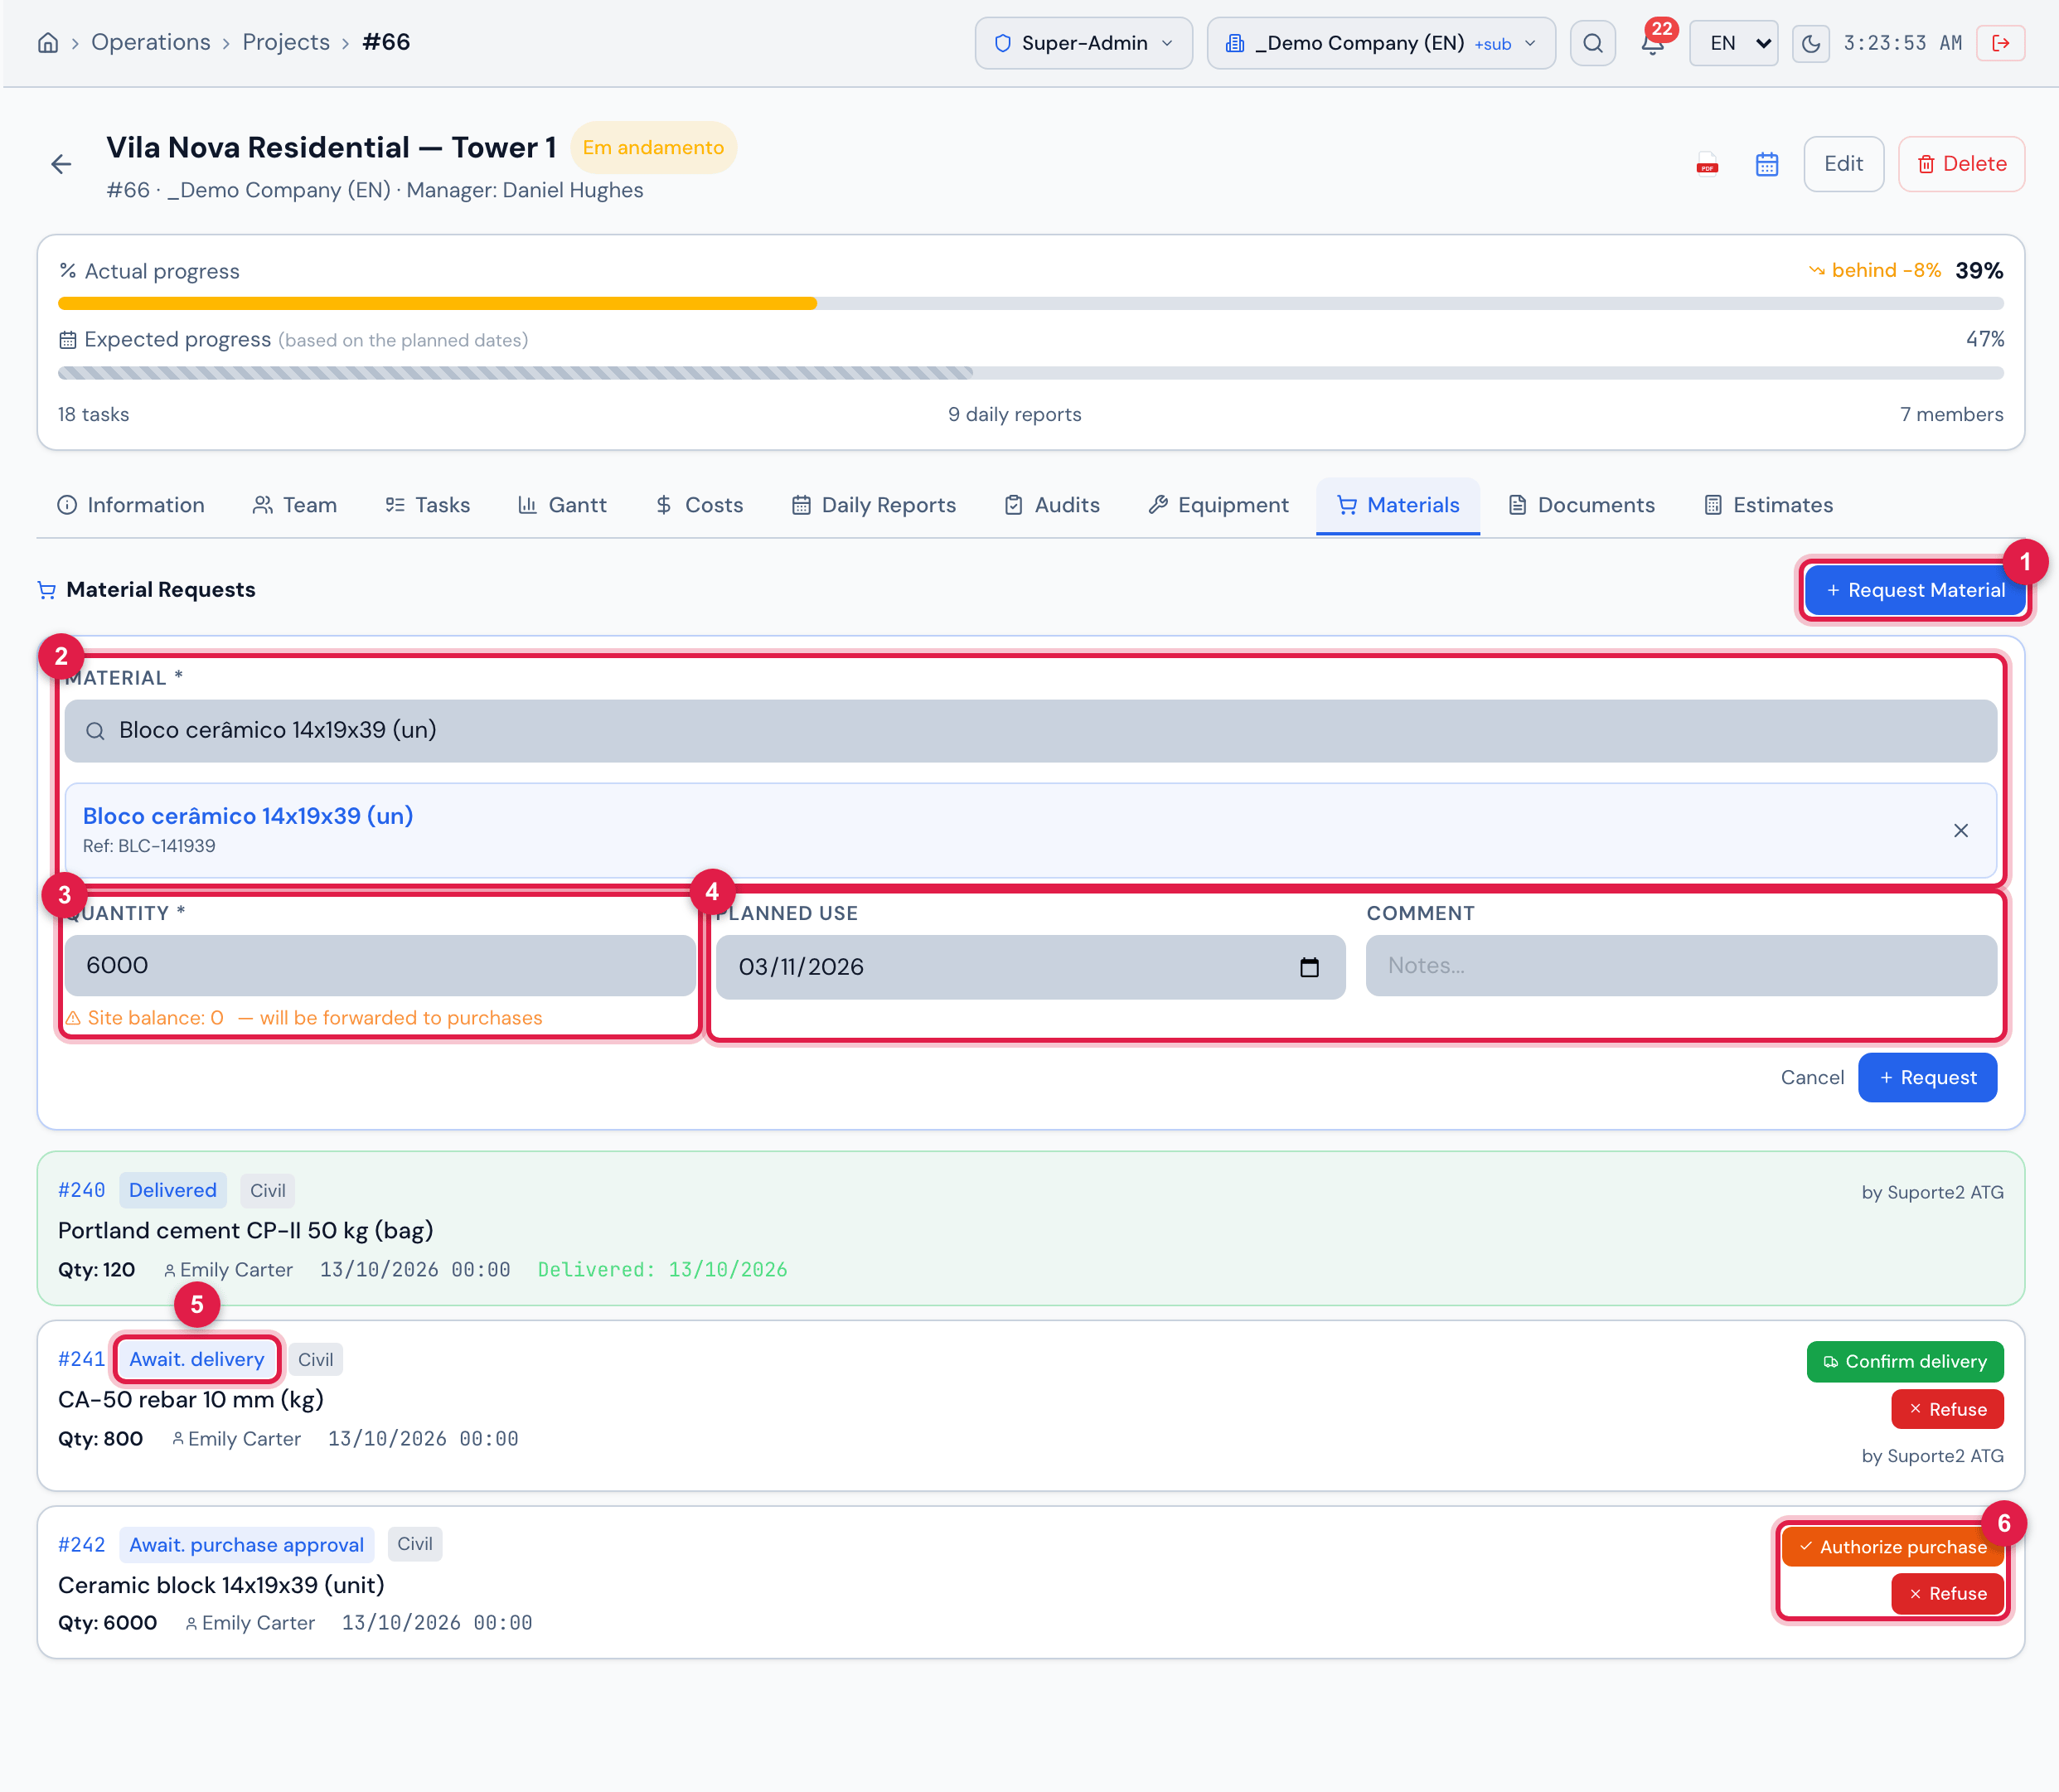
Figure 22. Materials tab: the request form with Ceramic block 14x19x39 (unit) above the site balance and, below, the three requests of the project — cement Delivered, rebar Await. delivery and block Await. purchase approval — with the available actions.
- 1Request Material — it needs the Create right in Consumables.
- 2Material — search by name and pick from the list (each search result brings the Stock at site); the chosen material is highlighted just below.
- 3Quantity, in the material’s unit, and the Site balance — in amber with — will be forwarded to purchases when there is no balance.
- 4Planned use and Comment.
- 5A request, with its state badge.
- 6The buttons of the next step (in the example, Authorize purchase and Refuse; on the rebar request, Confirm delivery).
| Path | States |
|---|---|
| With balance at the site | Await. release approval → (Authorize use) → Await. delivery → (Confirm delivery) → Delivered. |
| Without balance | Await. purchase approval → (Authorize purchase) → Purchase in progress → (Purchase started) → Await. purchase completion → (Complete purchase) → Await. delivery → Delivered. |
| Refusal | Refuse leads to Refused at any step before delivery. |
The buttons of each request depend on the state and on the profile of whoever is viewing. The warehouse follows the same requests in Warehouse › Material Requests. When a request is delivered, the value of the material goes into the Costs tab by itself (chapter 8).
Documents
Section titled “Documents”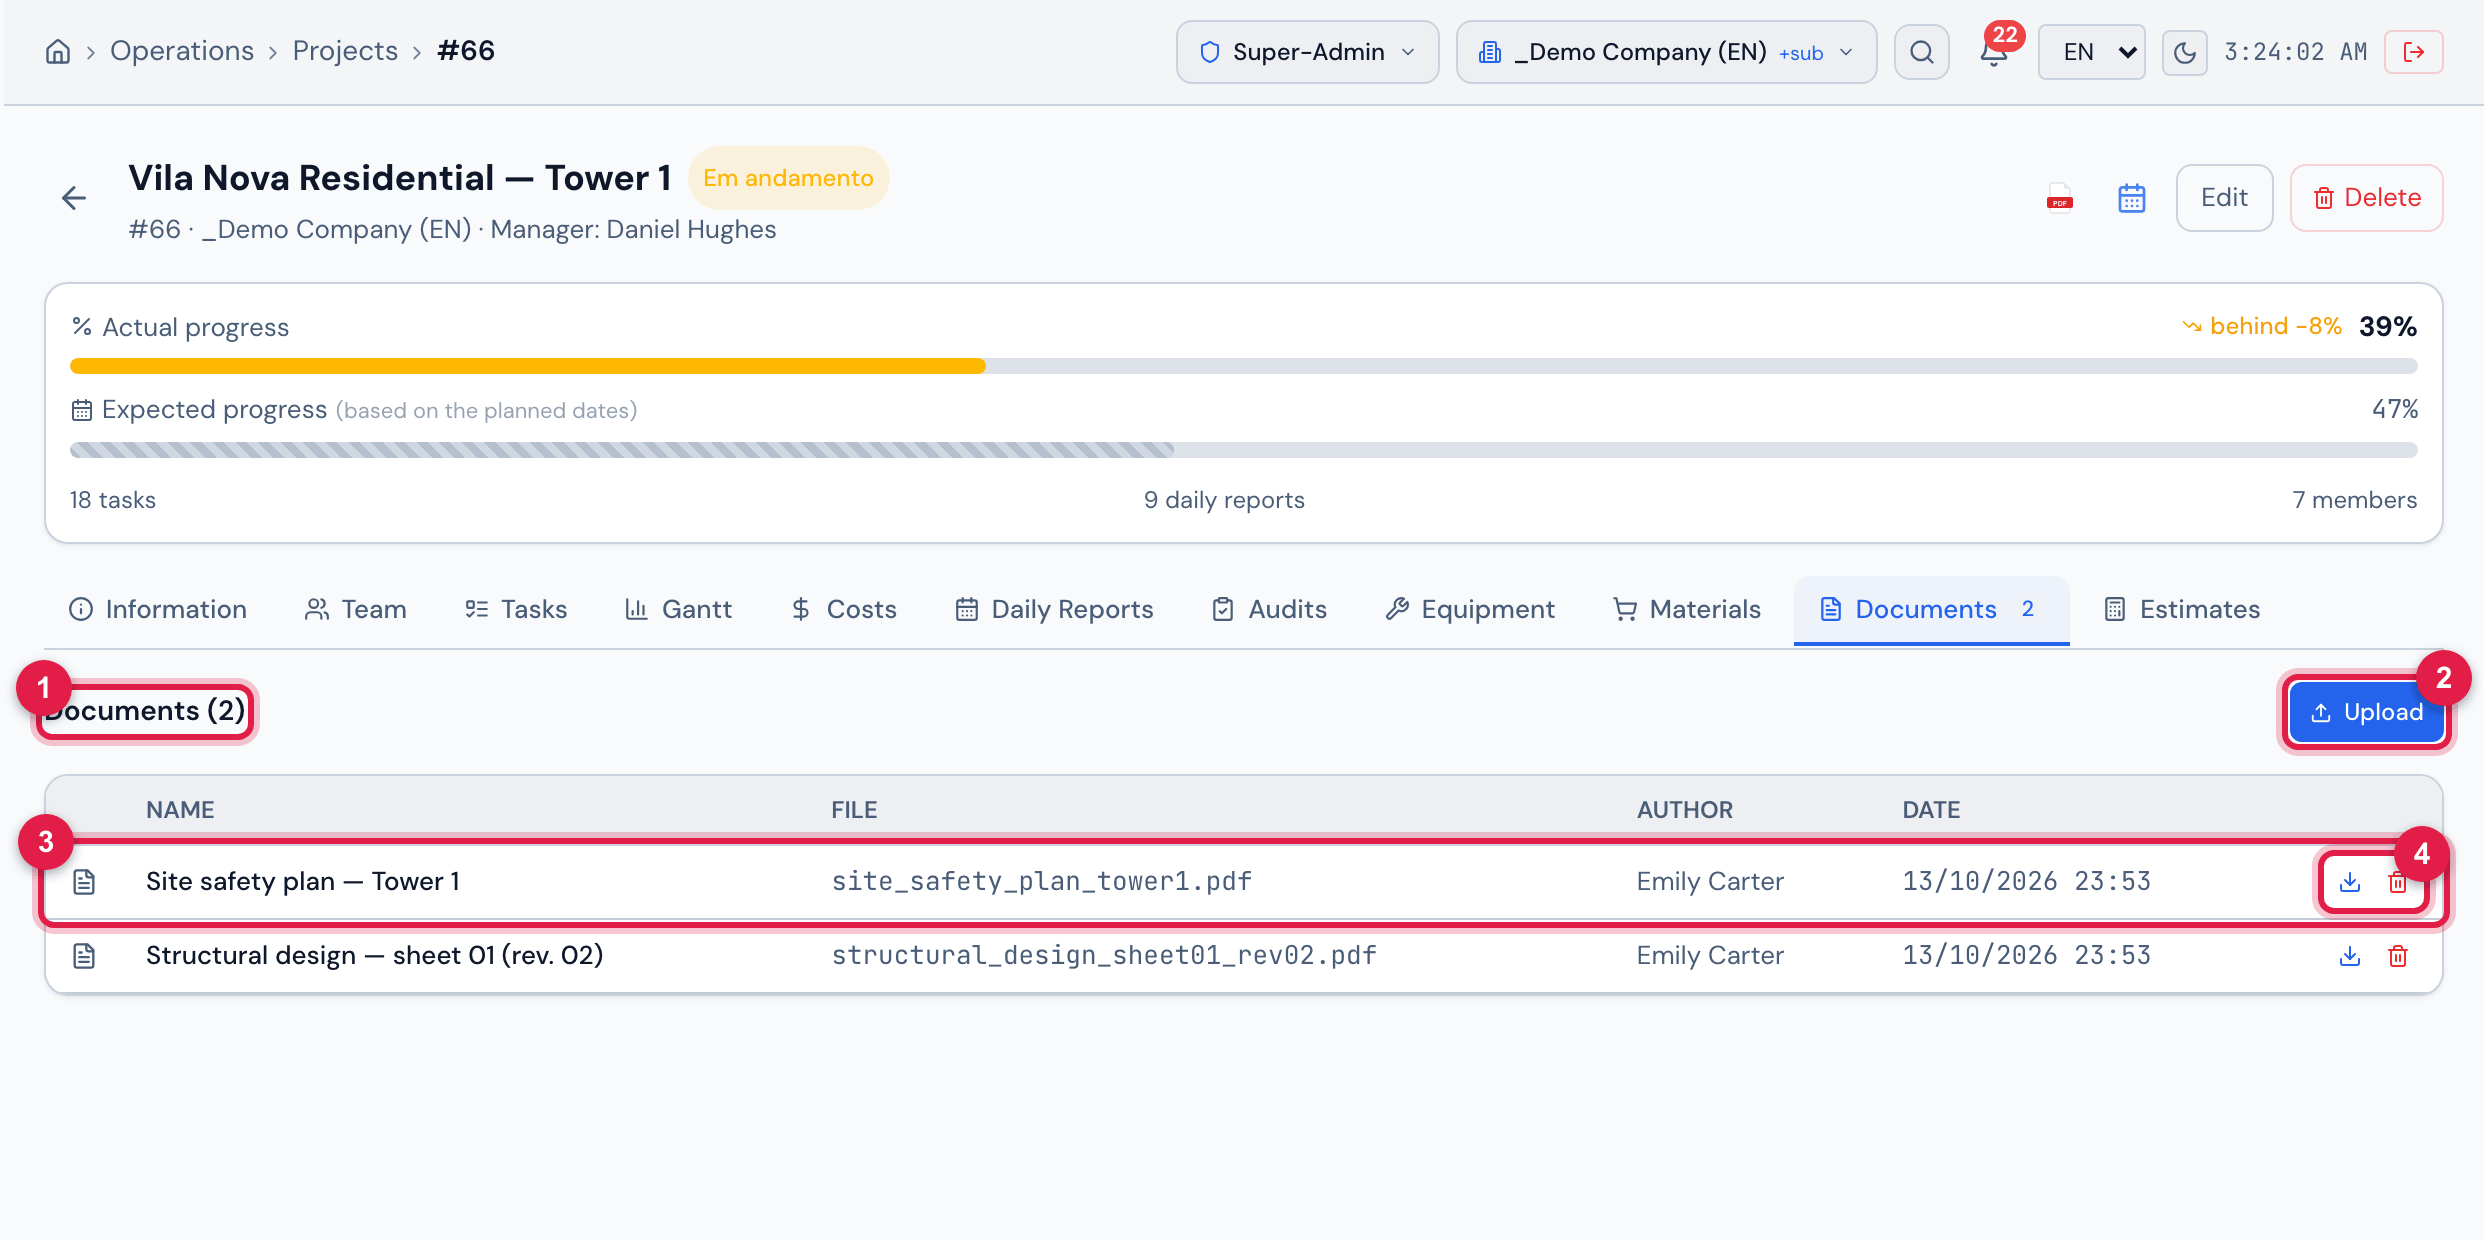
Figure 23. Documents tab: the Upload button and the list with Name, File, Author and Date — Structural design — sheet 01 (rev. 02) and Site safety plan — Tower 1.
- 1Documents (N).
- 2Upload — sends a file. It needs the Create right in Projects.
- 3A document: name, file, author and date.
- 4Download and Remove.
- One file at a time, up to 200 MB: construction drawings in PDF, technical responsibility records, the client’s schedule, reports, survey photos.
- Remove asks for confirmation (Remove this document?) and needs Trash in Projects.
- Documents stay on the web only; the app does not show the tab.
Was this page helpful?
Thanks for the feedback!
Got it — we will improve this page.