
The schedule calendar
Manual — Automatic Scheduling · chapter 5 of 8
Click a schedule to open its page: the header with the status, the totals, the Hours by Month, the calendar with one event per ticket and, at the end, the Schedule Items (chapter 6).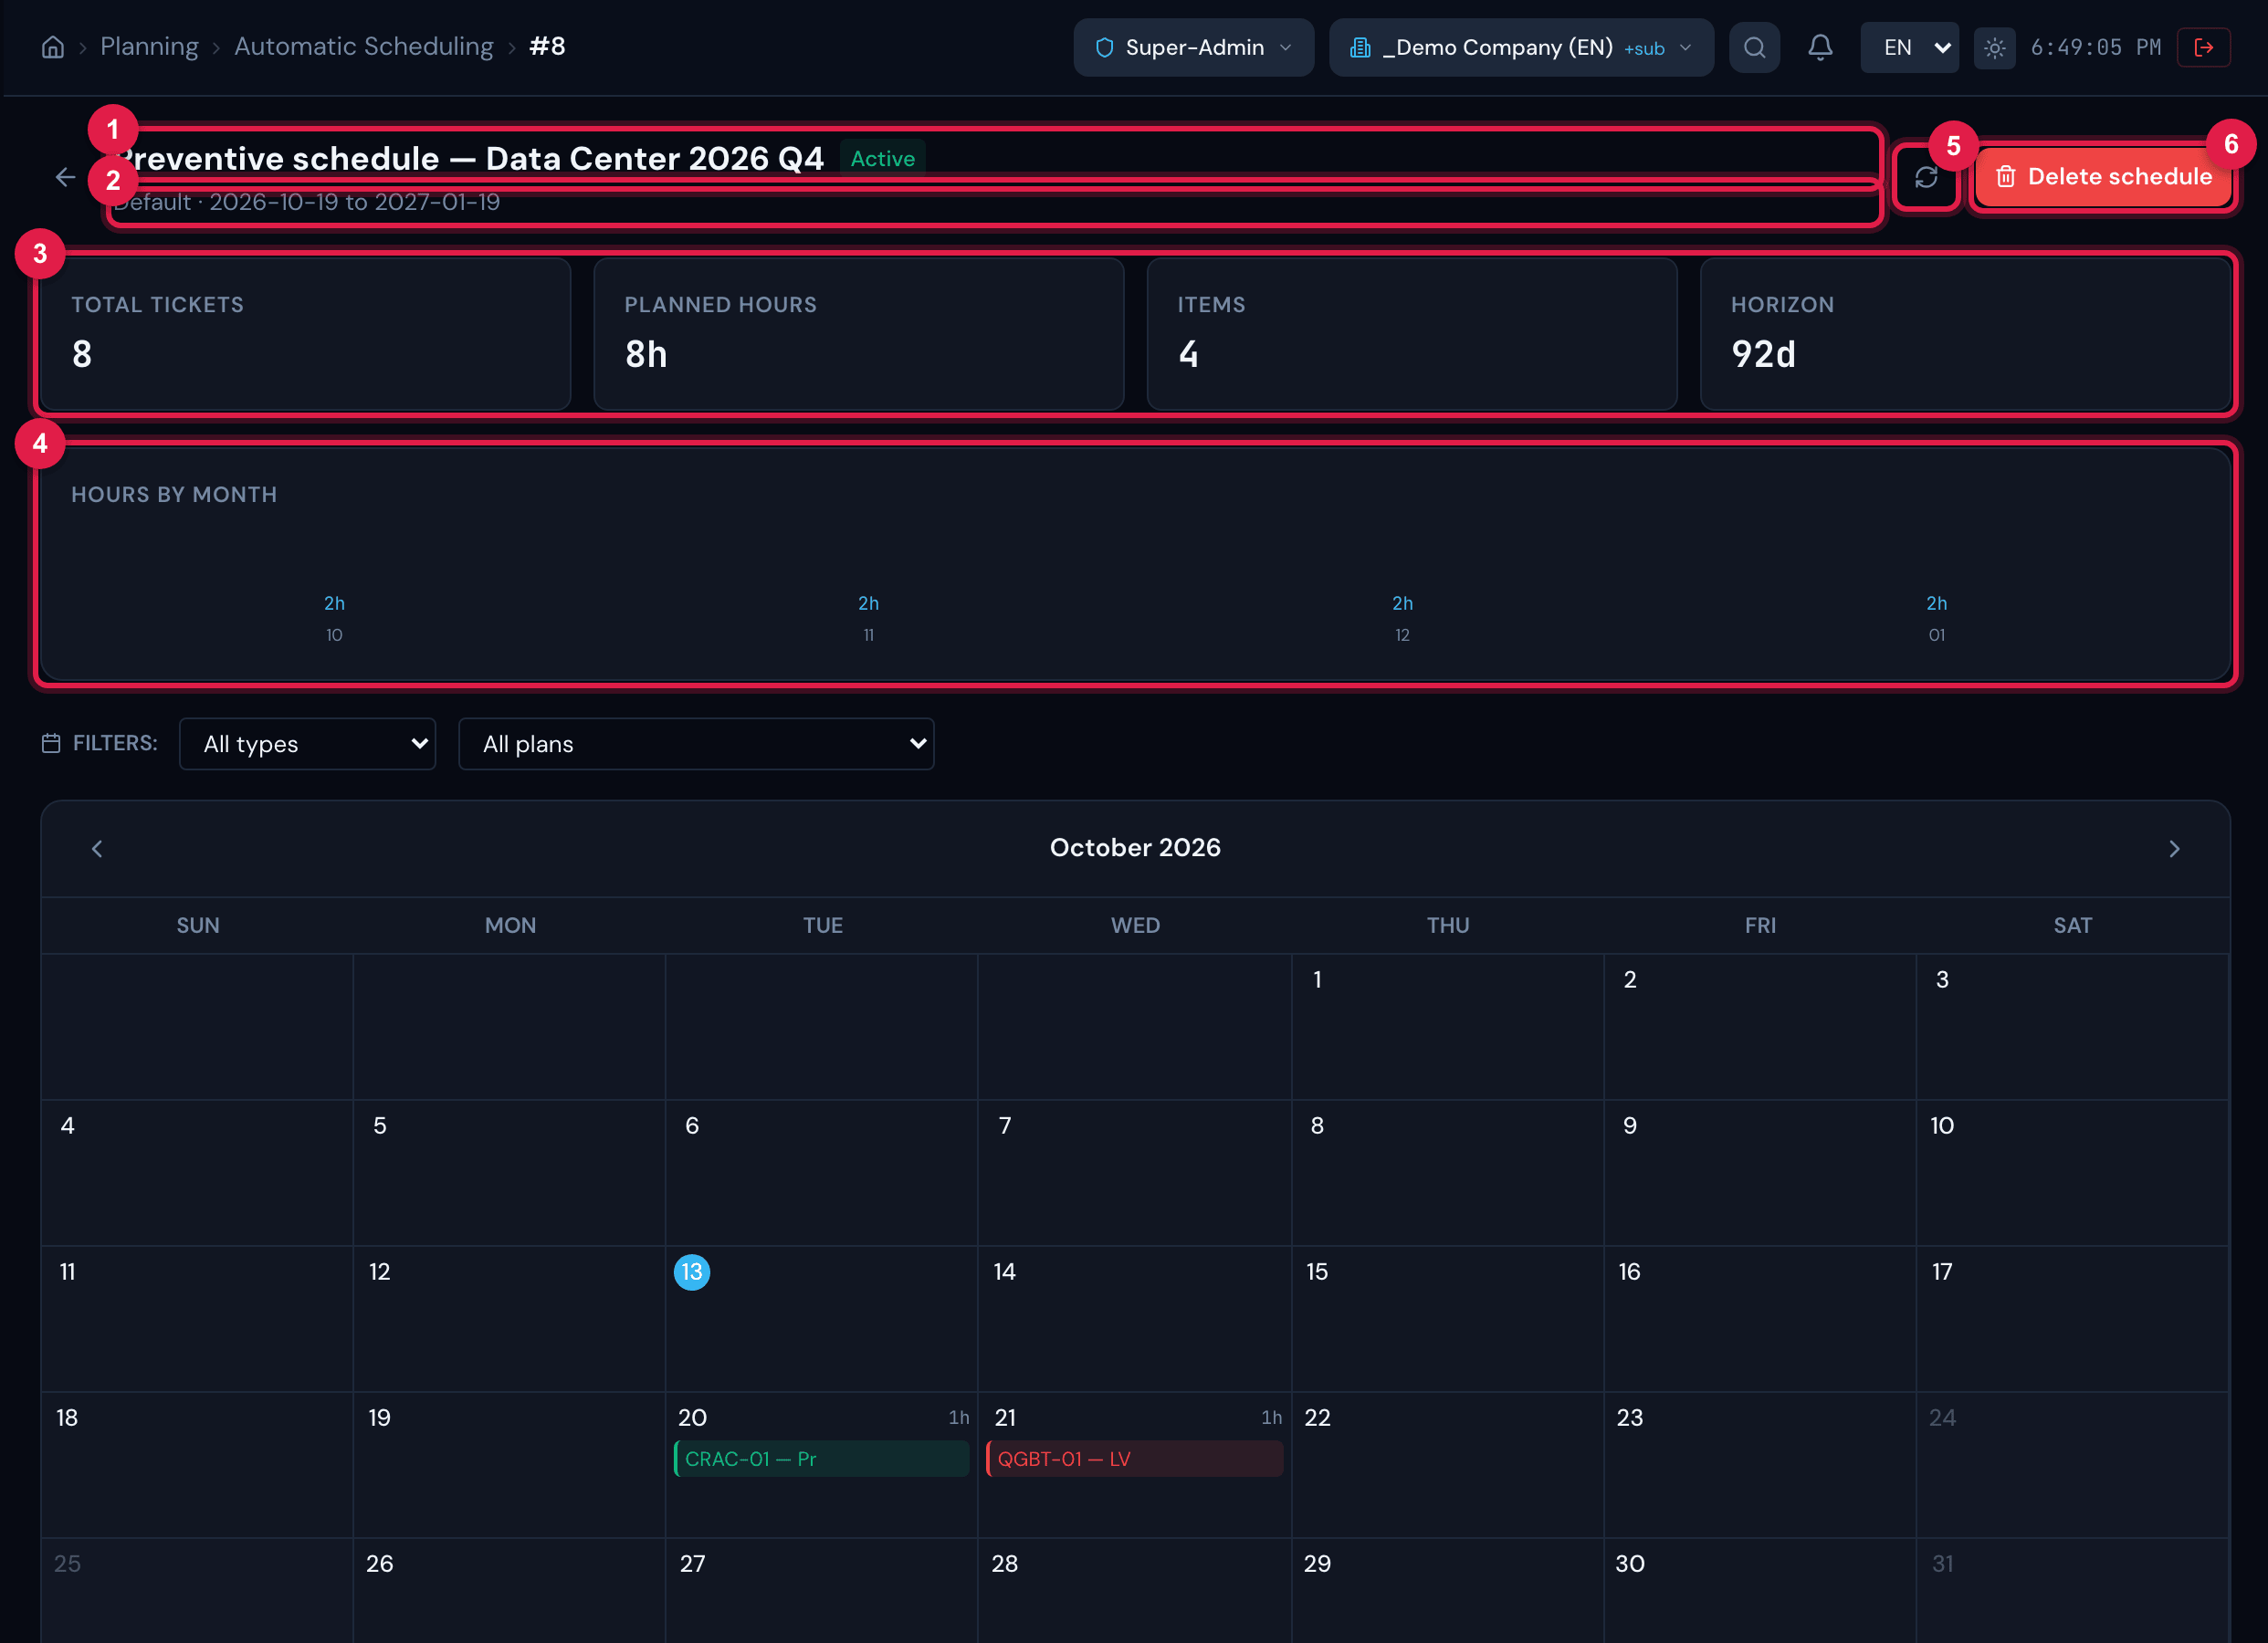
Figure 10. The schedule page: name and status, calendar and period, the four summary cards and the Hours by Month chart.
- 1Name and status Active.
- 2Calendar and period (Start to Horizon).
- 3Total Tickets, Planned Hours, Items and Horizon (in days).
- 4Hours by Month — the sum of the durations of each month’s tickets, by adjusted date.
- 5Reload — re-reads the calendar.
- 6Delete schedule (chapter 6).
- Total Tickets counts all tickets generated by the active items, in any status; Planned Hours adds up the plan duration of each one. Both are the real number, not the wizard’s estimate.
- Use Hours by Month to spot overloaded months and, if needed, move tickets (below).
The monthly calendar
Section titled “The monthly calendar”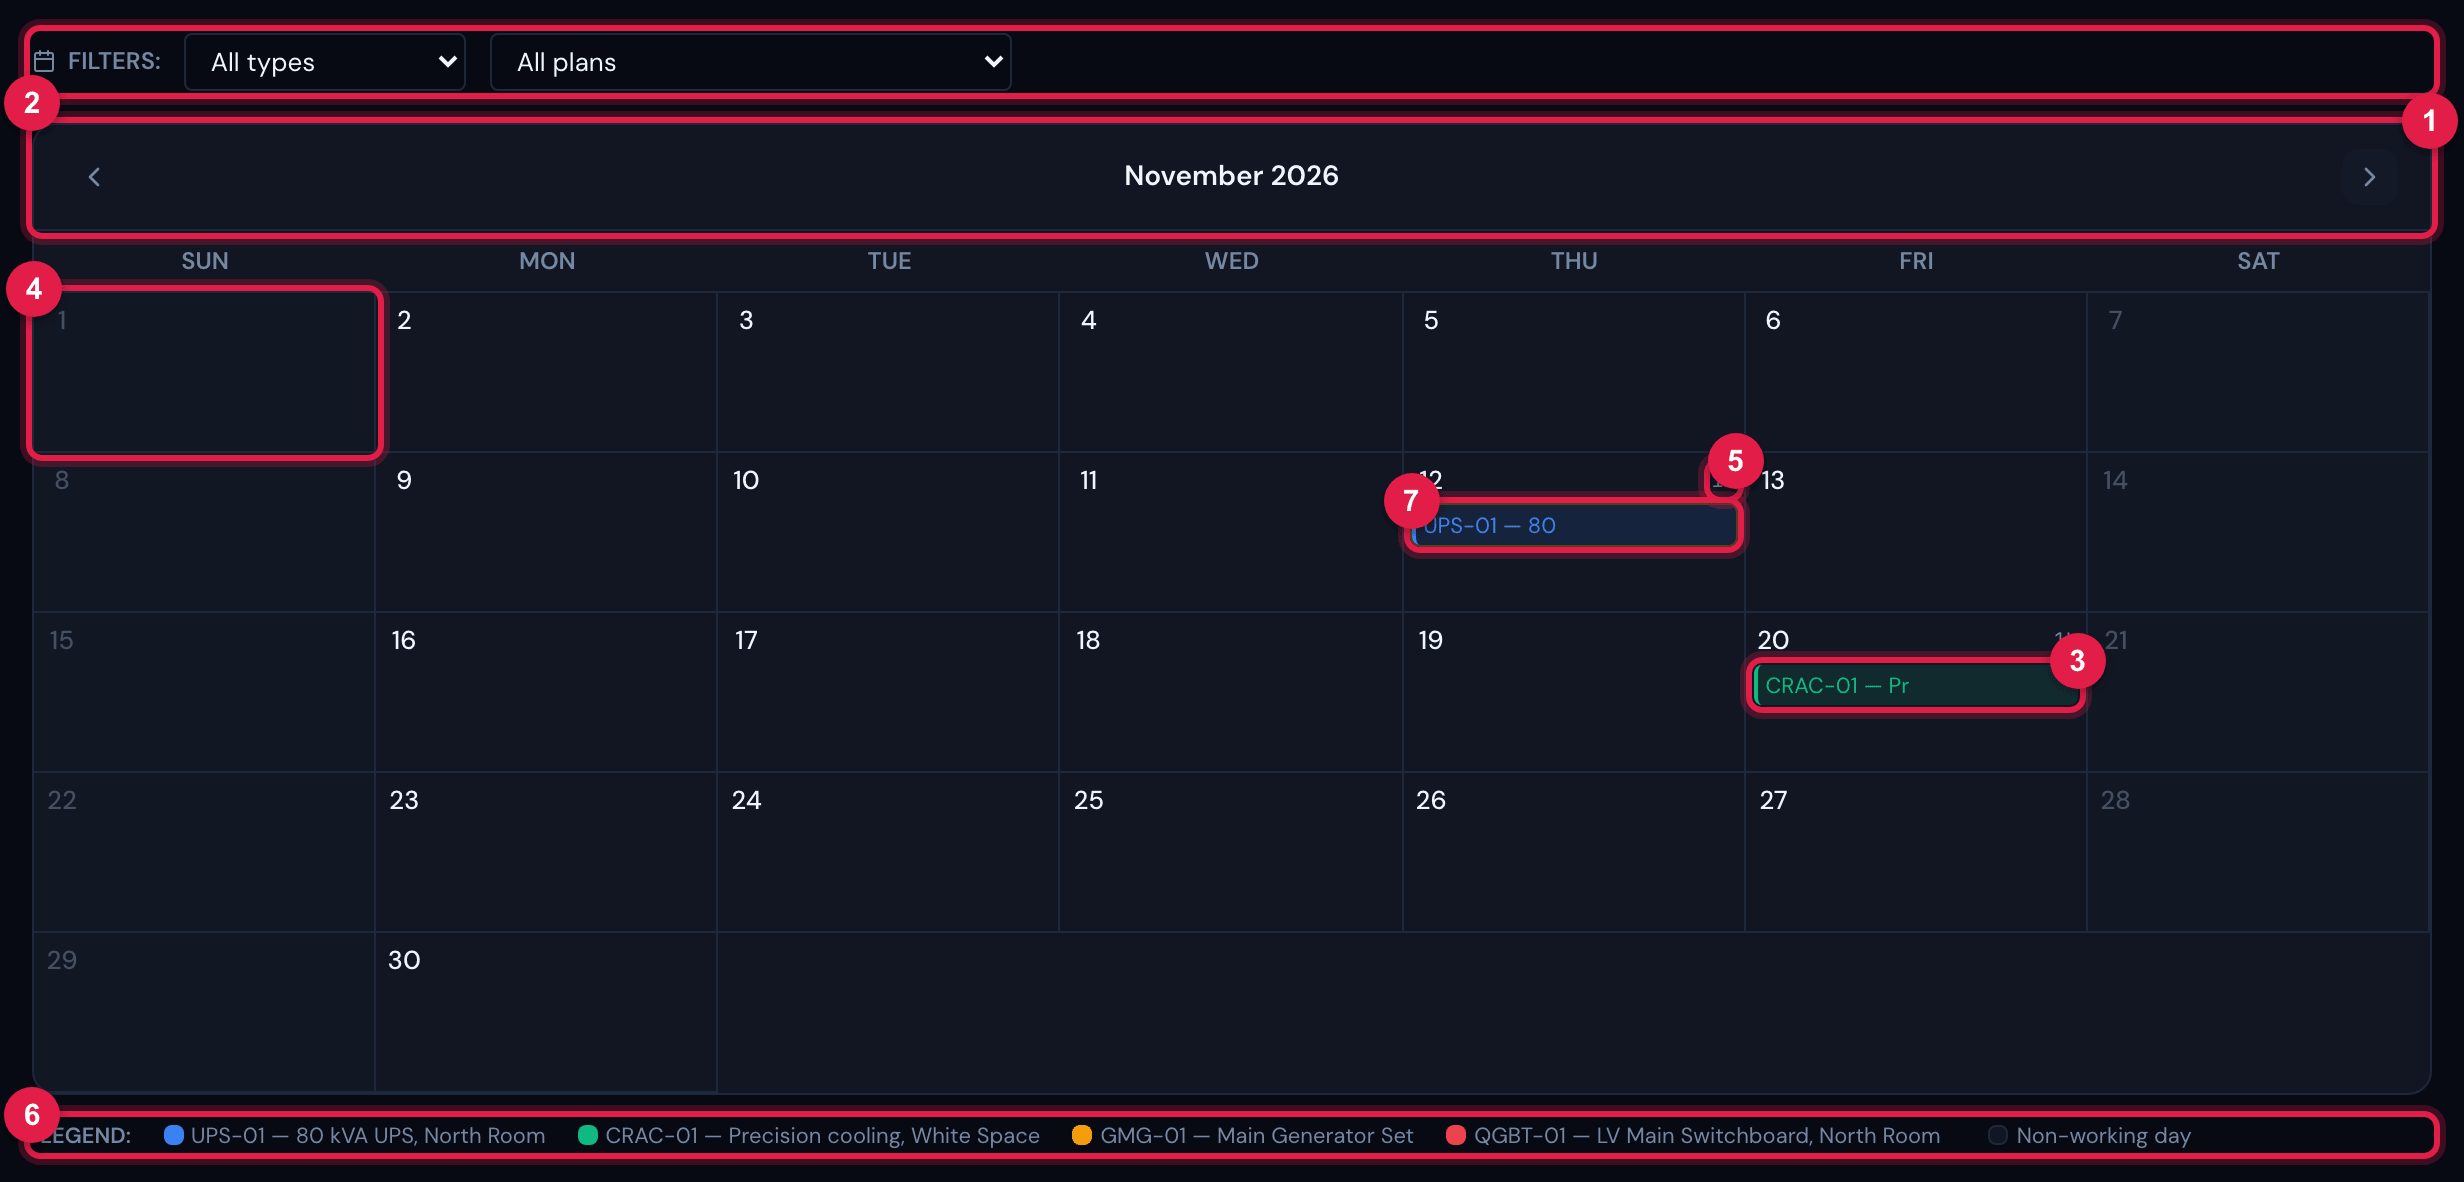
Figure 11. The November 2026 calendar: one event per ticket, non-working days in grey, the hours of each day and the legend.
- 1Arrows to change month; the page opens on the month of the Start Date.
- 2Filters: by asset type and by plan.
- 3An event — the asset name, in the item’s colour. Hover to see number, title, plan, status and duration; click to open the ticket.
- 4Non-working day (weekend or calendar holiday), in grey: no ticket is generated on it.
- 5The planned hours of the day.
- 6Legend: one square per asset and the Non-working day.
- 7Ticket moved manually — amber outline (below).
- The calendar shows the tickets by adjusted date (after the working-day adjustment). Today is highlighted.
- A day shows up to three events; with more, +N more appears — use the filters or hover.
- The type filter uses the internal name of the asset family (e.g.
ups,electricals); the plan filter uses the template name. - The event shows the ticket’s current status: the calendar stays useful after execution, to see what has been solved and what is still planned.
Moving a ticket
Section titled “Moving a ticket”Drag the event to another day. H2O opens the Move Ticket window to confirm.
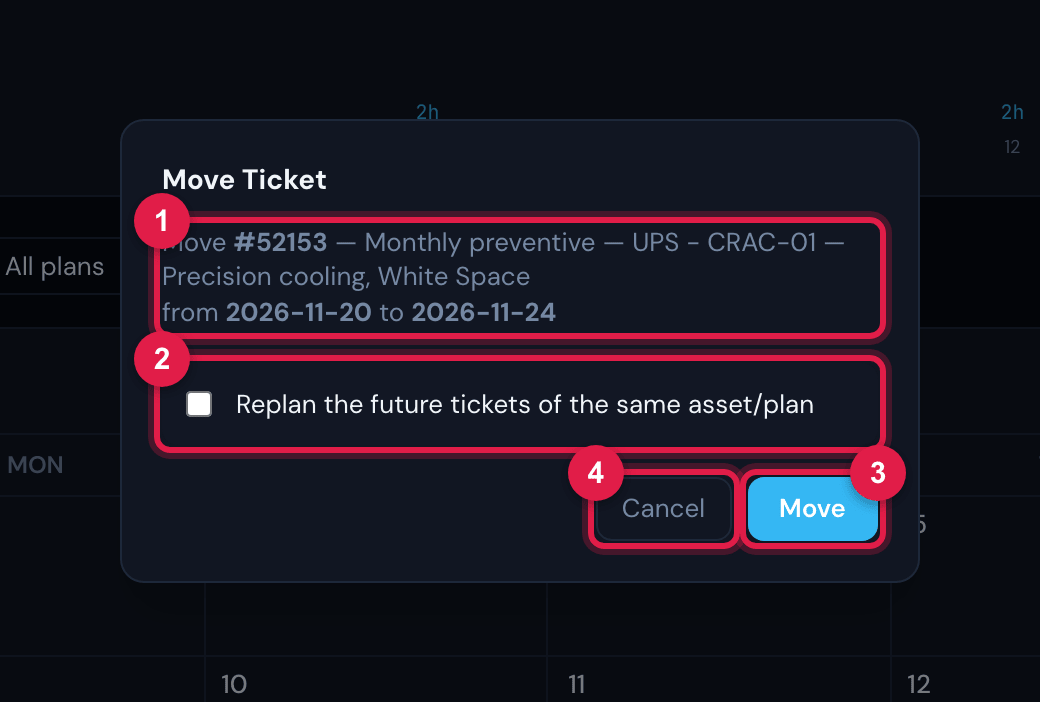
Figure 12. The Move Ticket window, opened when dropping the ticket on another day: the source and target dates, the option to replan the future ones and the buttons.
- 1Move #number — title, from date to date.
- 2Replan the future tickets of the same asset/plan — also shifts the following visits of the same item.
- 3Move — confirms.
- 4Cancel — the ticket stays where it was.
| What happens | Detail |
|---|---|
| Target date | if it falls on a non-working day, the ticket goes to the working day nearest to it (the same rule as generation). |
| The ticket | gets the new date, and the task goes to 08:00 of that day. The status does not change. |
| Mark | the ticket is marked as moved manually (amber outline on the calendar) — and so it no longer goes to the trash when the schedule is deleted (chapter 6). |
| With Replan the future tickets | all the later tickets of the same item (same asset and plan) that are not yet solved or closed are shifted by the same number of days, one by one, each re-adjusted to a working day. This includes the ones that had already been moved manually. |
| Without replanning | only that ticket changes. |
- The screen does not prevent dragging a ticket already solved or closed; avoid it — move only the ones still to happen. Replanning, in turn, skips the solved and closed ones.
- Moving sends no notification. If the technician already had the task in their agenda, let them know.
- To replan several items at once from a date, there is no button today; move item by item with the replan option.
Was this page helpful?
Thanks for the feedback!
Got it — we will improve this page.