
Components and replacement forecast
Manual — Assets · chapter 5 of 12
The Components tab lists the parts tracked inside the asset — filters, belts, batteries, bearings, seals — and tells, for each one, when to replace it. The forecast can be by time (date), by usage (hours, kilometers, cycles: the reading of a counter) or by both, and each replacement recorded restarts the cycle and stays in the part’s history.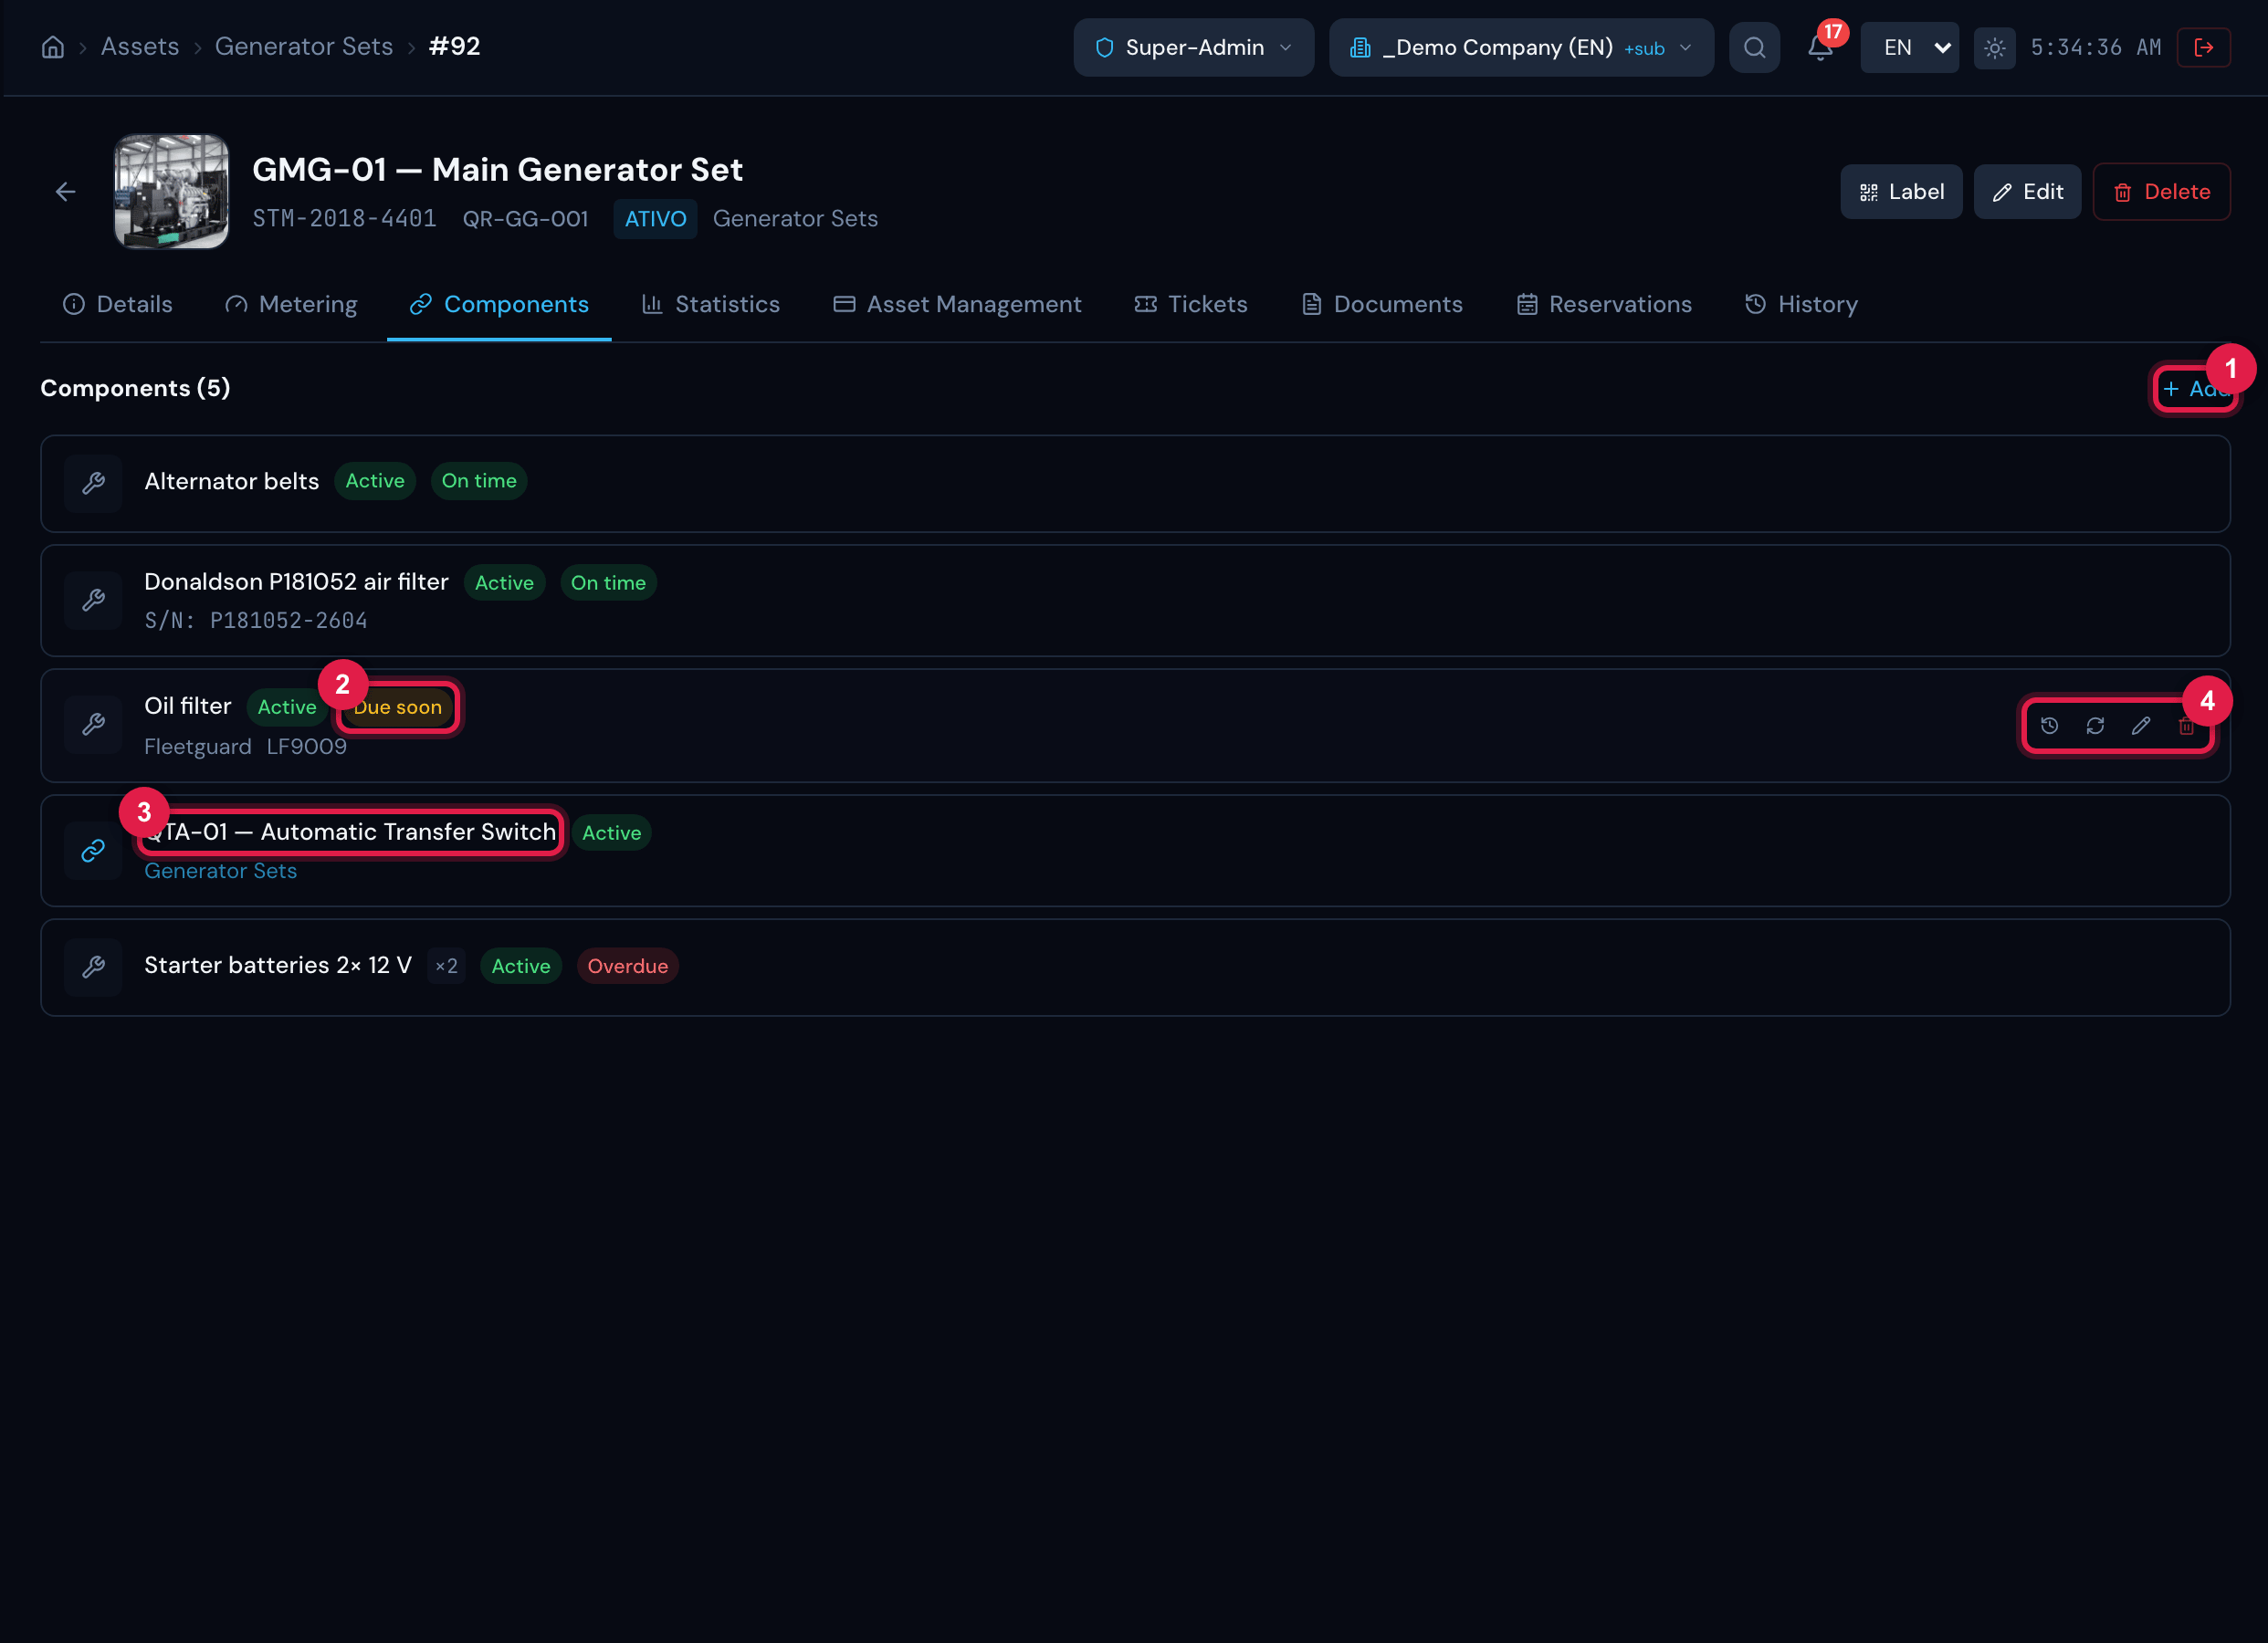
Figure 11. Components tab of the generator set: each component with quantity, registration status and the replacement forecast badge (On time, Due soon, Overdue). The row buttons appear on hover.
- 1Add (new component).
- 2Forecast badge — hover to see “in N day(s)” or the usage left.
- 3Component linked to another asset: the name opens its record.
- 4Row buttons: replacement history, Record replacement, edit and remove.
Registering a component
Section titled “Registering a component”- In the Components tab, click Add.
- Choose the mode: Standalone component (only name, serial, manufacturer and model) or Link existing asset — in that case choose the Asset type, type at least 2 letters in Search asset (name, serial or tag), press Enter (or click the magnifier) and click the asset; H2O confirms “Asset #N selected”. The asset’s own type is not in the list, and an asset cannot be a component of itself.
- Fill in Name (required), Serial, Quantity and Status (Active, Inactive, Maintenance or Discarded).
- In Replacement forecast, choose No tracking, By time, By usage or By time and usage and fill in the fields that appear (table below).
- Click Add.
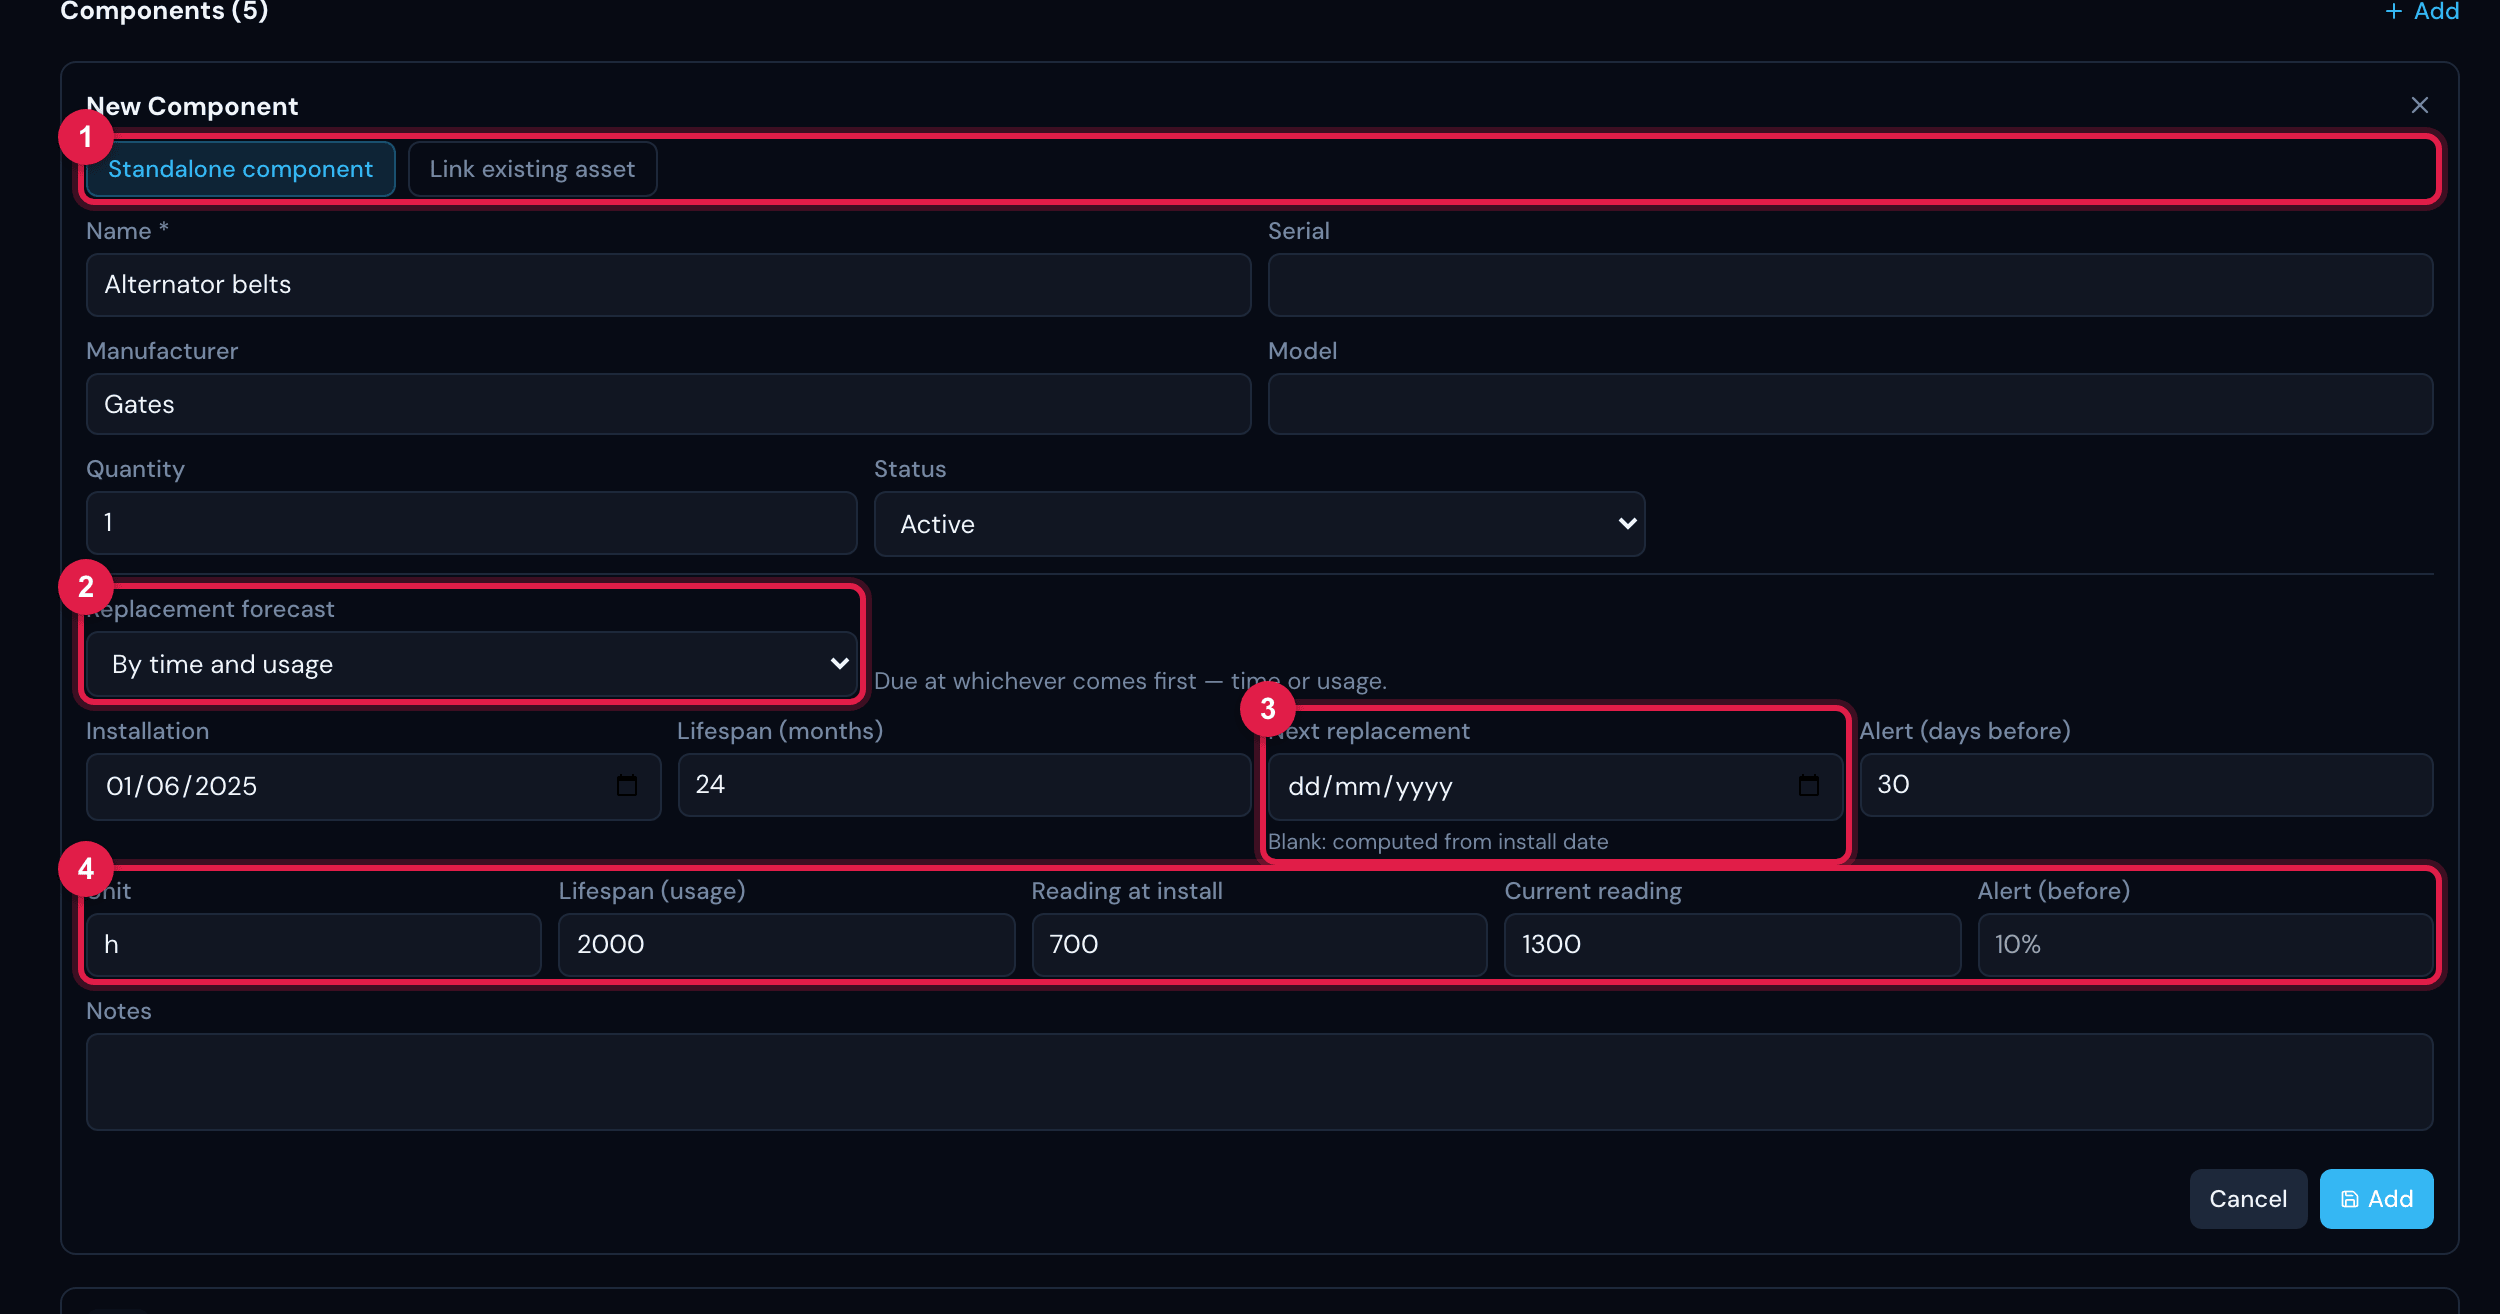
Figure 12. The New Component form with the By time and usage forecast (the alternator belts): Installation, Lifespan (months), Next replacement, Alert (days before), Unit, Lifespan (usage), Reading at install, Current reading and Alert (before).
- 1Standalone component and Link existing asset modes.
- 2Replacement forecast — “Due at whichever comes first — time or usage.”
- 3Next replacement — “Blank: computed from install date”.
- 4Fields of the usage tracking.
| Forecast | Fields | When it becomes Due soon / Overdue |
|---|---|---|
| By time | Installation, Lifespan (months), Next replacement and Alert (days before) (default 30) | Blank next replacement = installation + lifespan (01/31 + 1 month gives 02/28). Due soon when at most the alert days remain; Overdue after the date. |
| By usage | Unit (default h), Lifespan (usage), Reading at install, Current reading and Alert (before) | Left = reading at install + lifespan − current reading. Due soon when what is left is less than or equal to the alert (blank: 10% of the lifespan); Overdue when it has passed. |
| By time and usage | Both groups | The worse of the two applies — “250 h or 1 year, whichever comes first”. |
| No tracking | — | No forecast badge. |
Recording a replacement
Section titled “Recording a replacement”- Hover over the component row and click Record replacement (arrows icon).
- Choose the Type: Replacement, Removal or Installation; the Reason (Preventive, Corrective, Upgrade, Defect, Warranty or Other) and, if there is one, the ticket number in Ticket (optional).
- For a Replacement, enter the New component — Name (required), Serial, Manufacturer and Model. If tracking is by usage, enter the Counter reading at replacement (“Becomes the new cycle baseline. Blank: keeps current reading.”).
- Write the Notes, if you wish, and click Record.
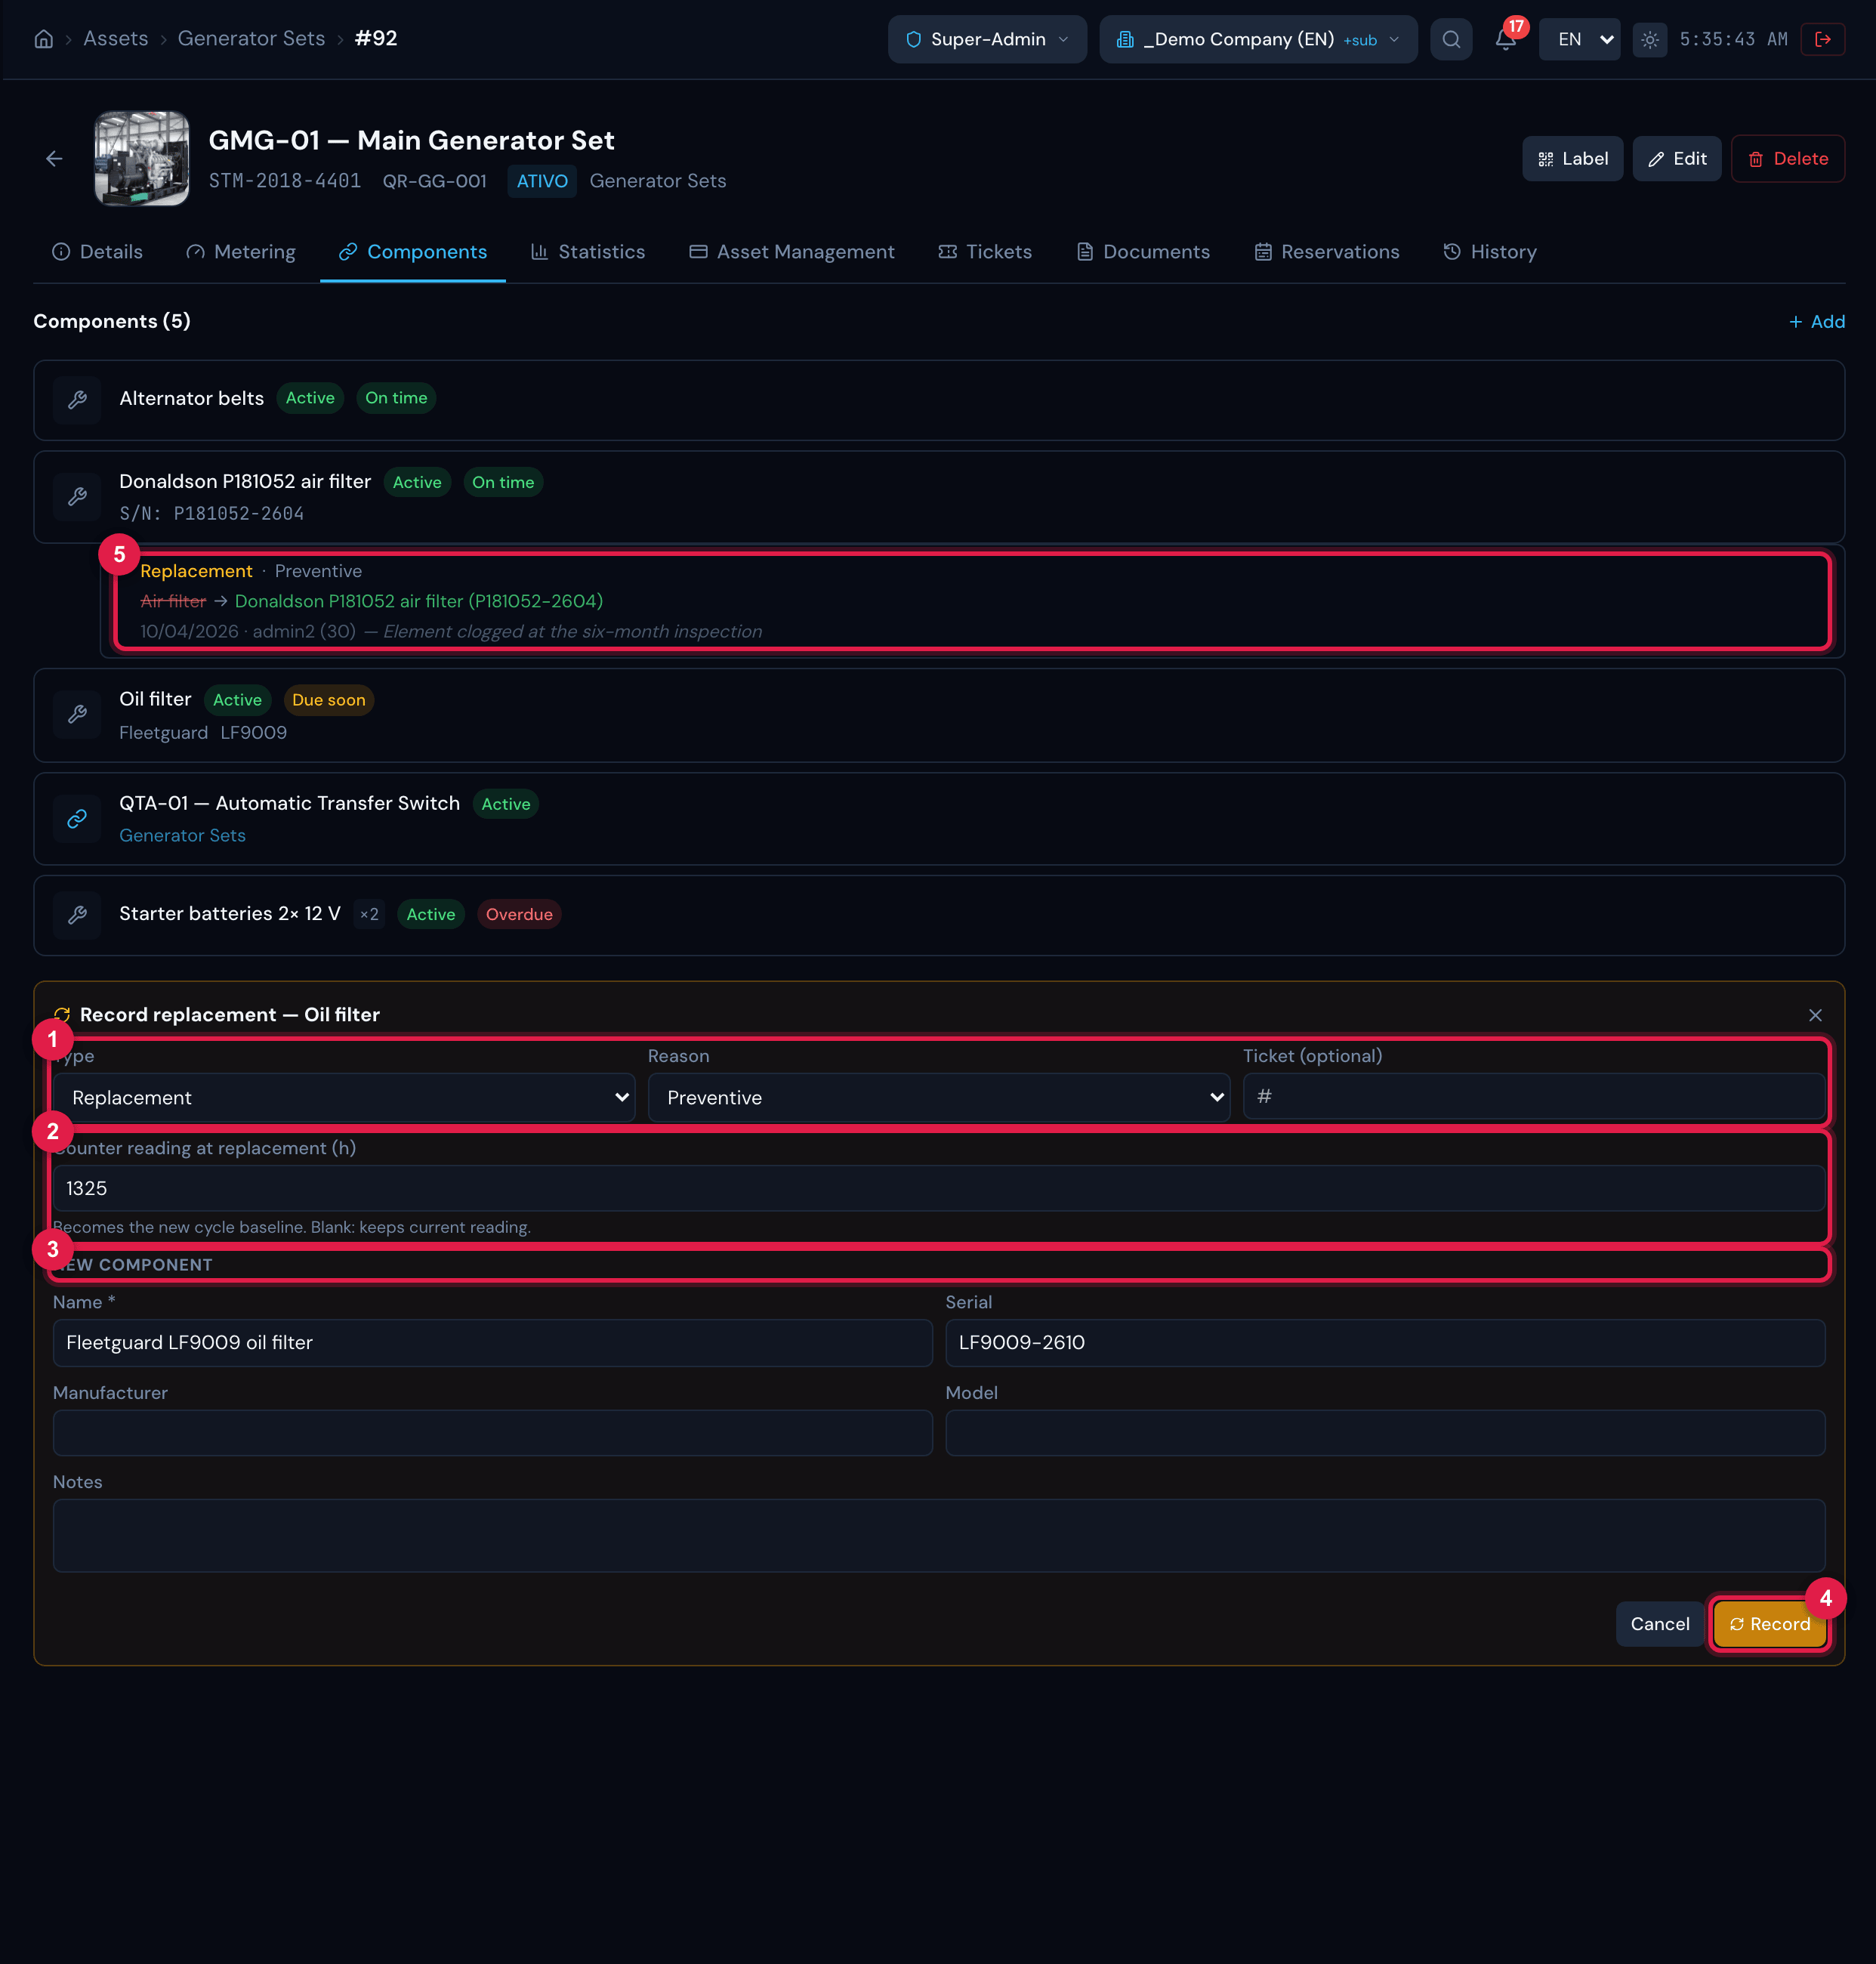
Figure 13. Record replacement — Oil filter: Type Replacement, Reason Preventive, Ticket (optional), Counter reading at replacement and the new component data. Below another row, the Replacement history open.
- 1Type and Reason of the replacement.
- 2Counter reading at replacement (usage tracking only).
- 3New component data.
- 4Record.
- 5Replacement history: the old name struck through → the new one, date, who recorded it and the notes.
| Type | What happens to the component |
|---|---|
| Replacement | It takes the name, serial, manufacturer and model of the new one and goes back to Active. With a forecast configured, the cycle restarts: the installation becomes the replacement date, the next replacement is recalculated from the lifespan in months (without a lifespan in months, the next replacement is left blank for you to enter) and the reading at replacement becomes the new usage baseline. |
| Removal | It becomes Inactive and stays in the list, with its history. |
| Installation | Only records the installation in the history; the registration does not change. |
The same replacement forecast appears in the reports: the ticket’s RAT (service report), the checklist report and the inspection report list the components of the assets with the status of each one.
Used as a component in
Section titled “Used as a component in”When the open asset is a component of another one, the tab shows, at the end, Used as a component in with the “parent” asset (name, type and tag). Click to open its record.
Replacement e-mail alert (switched off by default)
Section titled “Replacement e-mail alert (switched off by default)”H2O has two notification rules for components — Componente: troca a vencer (due soon) and Componente: troca vencida (overdue) —, but they come inactive and without recipients: until they are switched on, nobody receives an e-mail. To switch them on (administrator, Notifications right):
- Open System › Notifications, Notification Rules tab, and click the rule Componente: troca a vencer (rule names are shown in Portuguese).
- In Recipients (0), click Add, choose the type — Specific group, Specific user or By role —, select who receives it and click Add.
- Click the Inactive button at the top of the rule: it changes to Active.
- Repeat for Componente: troca vencida.
![The rule Componente: troca a vencer open in System › Notifications: the Summary ("When [...] → Notify: nobody"), the configuration and the empty Recipients section, with Add; at the top, the Inactive button.](/help/_astro/14-regra-componente.D91EYP2S.png)
Figure 14. The rule Componente: troca a vencer open in System › Notifications: the Summary (“When […] → Notify: nobody”), the configuration and the empty Recipients section, with Add; at the top, the Inactive button.
- 1Inactive / Active button — switches the rule on and off.
- 2Recipients — with none, nobody receives it.
- 3Add recipient.
Was this page helpful?
Thanks for the feedback!
Got it — we will improve this page.