
Automatic Scheduling: concepts
Manual — Automatic Scheduling · chapter 1 of 8
Automatic Scheduling creates, in one go, all the preventive maintenance tickets of a period: you choose the assets (a UPS, a generator set, the precision cooling units, a low-voltage main switchboard), the plans (what to do and how often) and the horizon (until when), and H2O calculates the dates, moves the ones that fall on a weekend or holiday and records a Planned ticket for each visit, already with the plan’s task and checklist.It was designed for those who operate critical infrastructure — data centers, substations, hospitals, industrial plants — and need the monthly UPS preventive, the quarterly generator inspection or the CRAC filter cleaning to happen on the right date, without someone opening ticket after ticket. It serves building maintenance on a construction site or in a condominium just as well.
| Term | What it is |
|---|---|
| Schedule | the whole: name, site, calendar, start date, horizon and the items. Each schedule is a row in the list. |
| Schedule item | an asset × plan pair, with the asset’s preferred day. The item is what generates the sequence of tickets. |
| Plan | a task template with Periodicity filled in (Knowledge › Templates). It carries the checklist, the expected duration, the category and the technician (chapter 2). |
| Horizon | the End Date: until when to generate tickets. All tickets are created at the moment the schedule is generated — nothing is created later, not even when the horizon arrives. |
| Calendar | defines working days and holidays. A date that falls on a non-working day goes to the nearest working day (chapter 2). |
| Planned ticket | the generated ticket. It is an ordinary H2O ticket, with status Planned, preventive modality, one task with the plan’s template and the asset linked (chapter 4). |
The schedule is not a “robot” that keeps running: when you click Generate Schedule, H2O creates every ticket of the horizon and that is it. For the next period, you create a new schedule.
Where it is
Section titled “Where it is”In the menu Planning › Automatic Scheduling. The screen opens with the list of schedules of the site chosen in the header (and of the sites below it), with search by name.
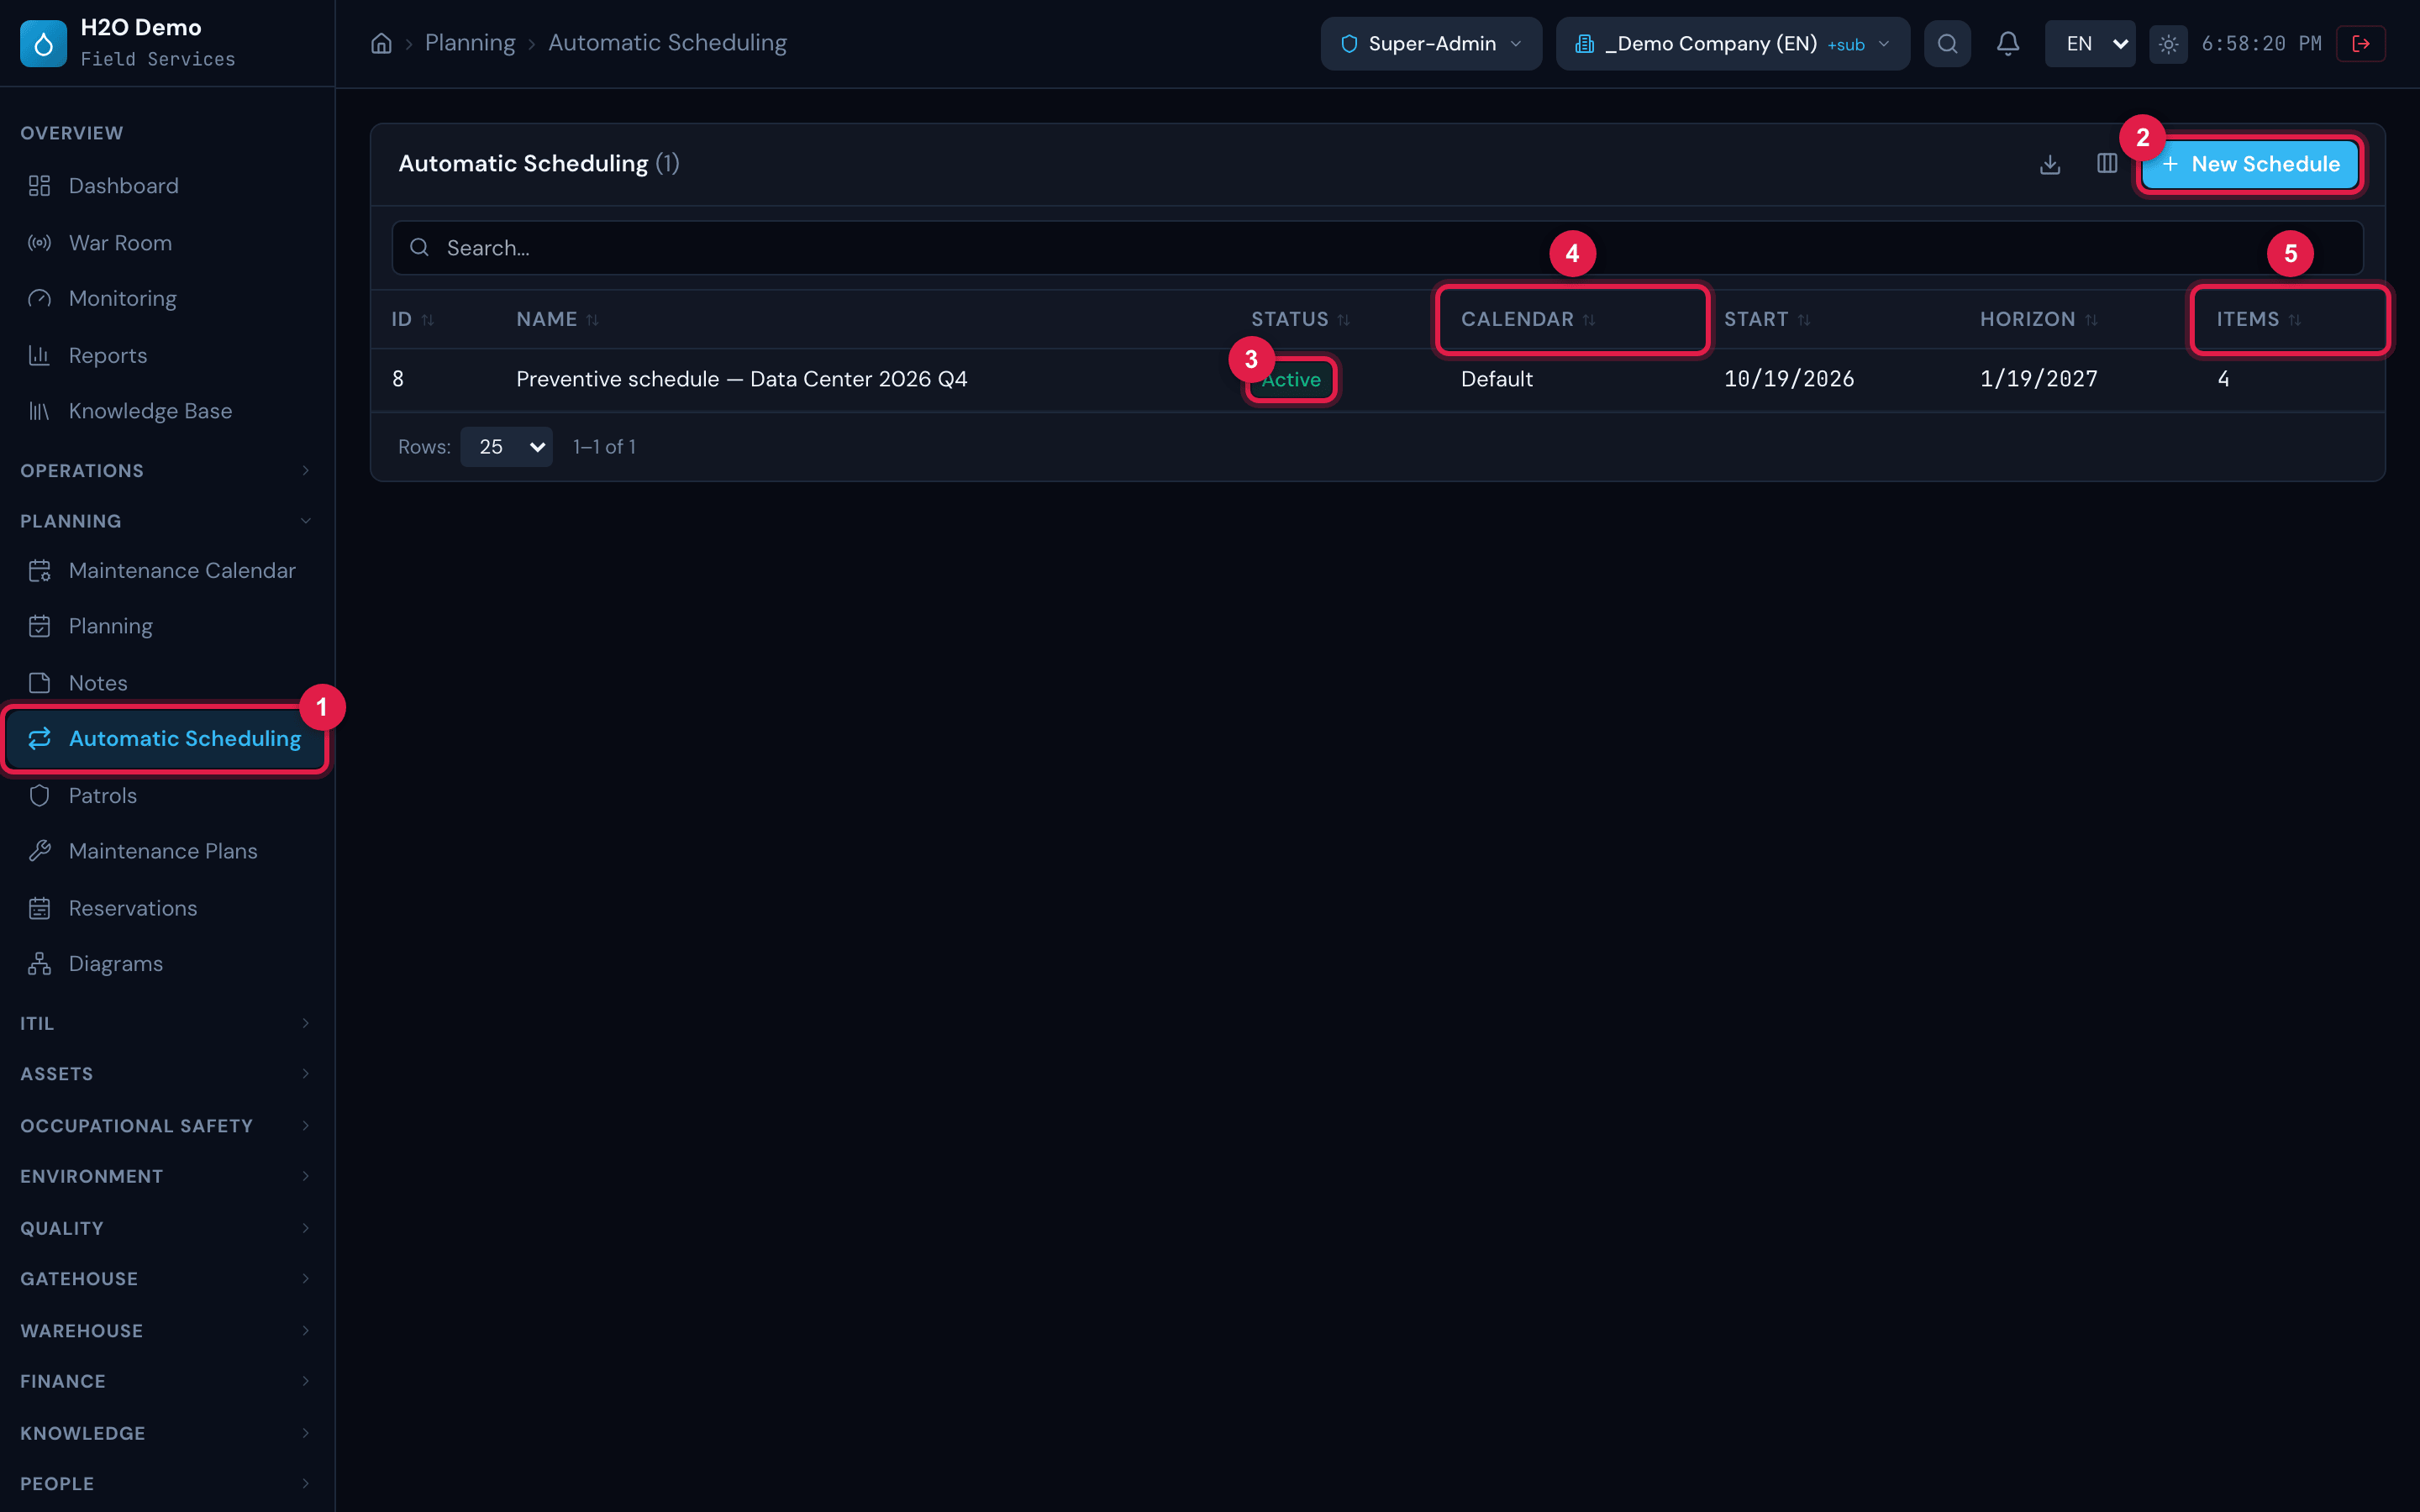
Figure 1. Planning › Automatic Scheduling: the list with ID, Name, Status, Calendar, Start, Horizon and Items, and the New Schedule button.
- 1Menu Planning › Automatic Scheduling.
- 2New Schedule — opens the wizard (chapter 3). Only shown with the Create right in Tickets.
- 3Schedule Status — Active for every schedule created on screen.
- 4Calendar, Start and Horizon (end date).
- 5Items — how many asset × plan pairs the schedule has.
| Column | What it shows |
|---|---|
| ID | the schedule number. |
| Name | the name given in the wizard (the list truncates long names; the detail page shows it in full). |
| Status | Active, Paused, Finished or Cancelled. Today the screen has no button to pause, finish or cancel: every schedule is born Active and stays so until it is deleted (chapter 6). |
| Calendar | the calendar used to adjust the dates. |
| Start / Horizon | the period in which the tickets were generated. |
| Items | the number of asset × plan pairs. |
Click a row to open the schedule page: summary, calendar of tickets and items (chapters 5 and 6).
Access rights
Section titled “Access rights”Automatic Scheduling has no right of its own: it uses the profile’s Tickets right (People › Profiles › profile › Permissions tab), because everything it does is create and move tickets.
| Level in Tickets | What it allows in Automatic Scheduling |
|---|---|
| Read | see the list, the page and the calendar of the schedules. |
| Create | New Schedule and Generate Schedule. |
| Update | Move Ticket on the calendar and Remove item. |
| Delete | Delete schedule; and, when removing an item, send the still-only-planned tickets to the trash (chapter 6). |
Was this page helpful?
Thanks for the feedback!
Got it — we will improve this page.