
Registering a site
Manual — Companies and hierarchy · chapter 4 of 9
There are two ways to create a site: the New Site button of the list, which opens the full registration and lets you choose the parent, and the New Sub-site button in a site record, which asks only for the name (and the CNPJ) and creates the site right below that one. Both require the Create level of the Sites / Entities right.New Site
Section titled “New Site”- In People › Sites, click New Site.
- In Hierarchy, choose the Parent Site — the site the new one will sit below. The list shows, by full name, all the sites you reach.
- Fill in Name (required) and any other fields you want (table below).
- Click Create. Site created appears and H2O opens the site record.
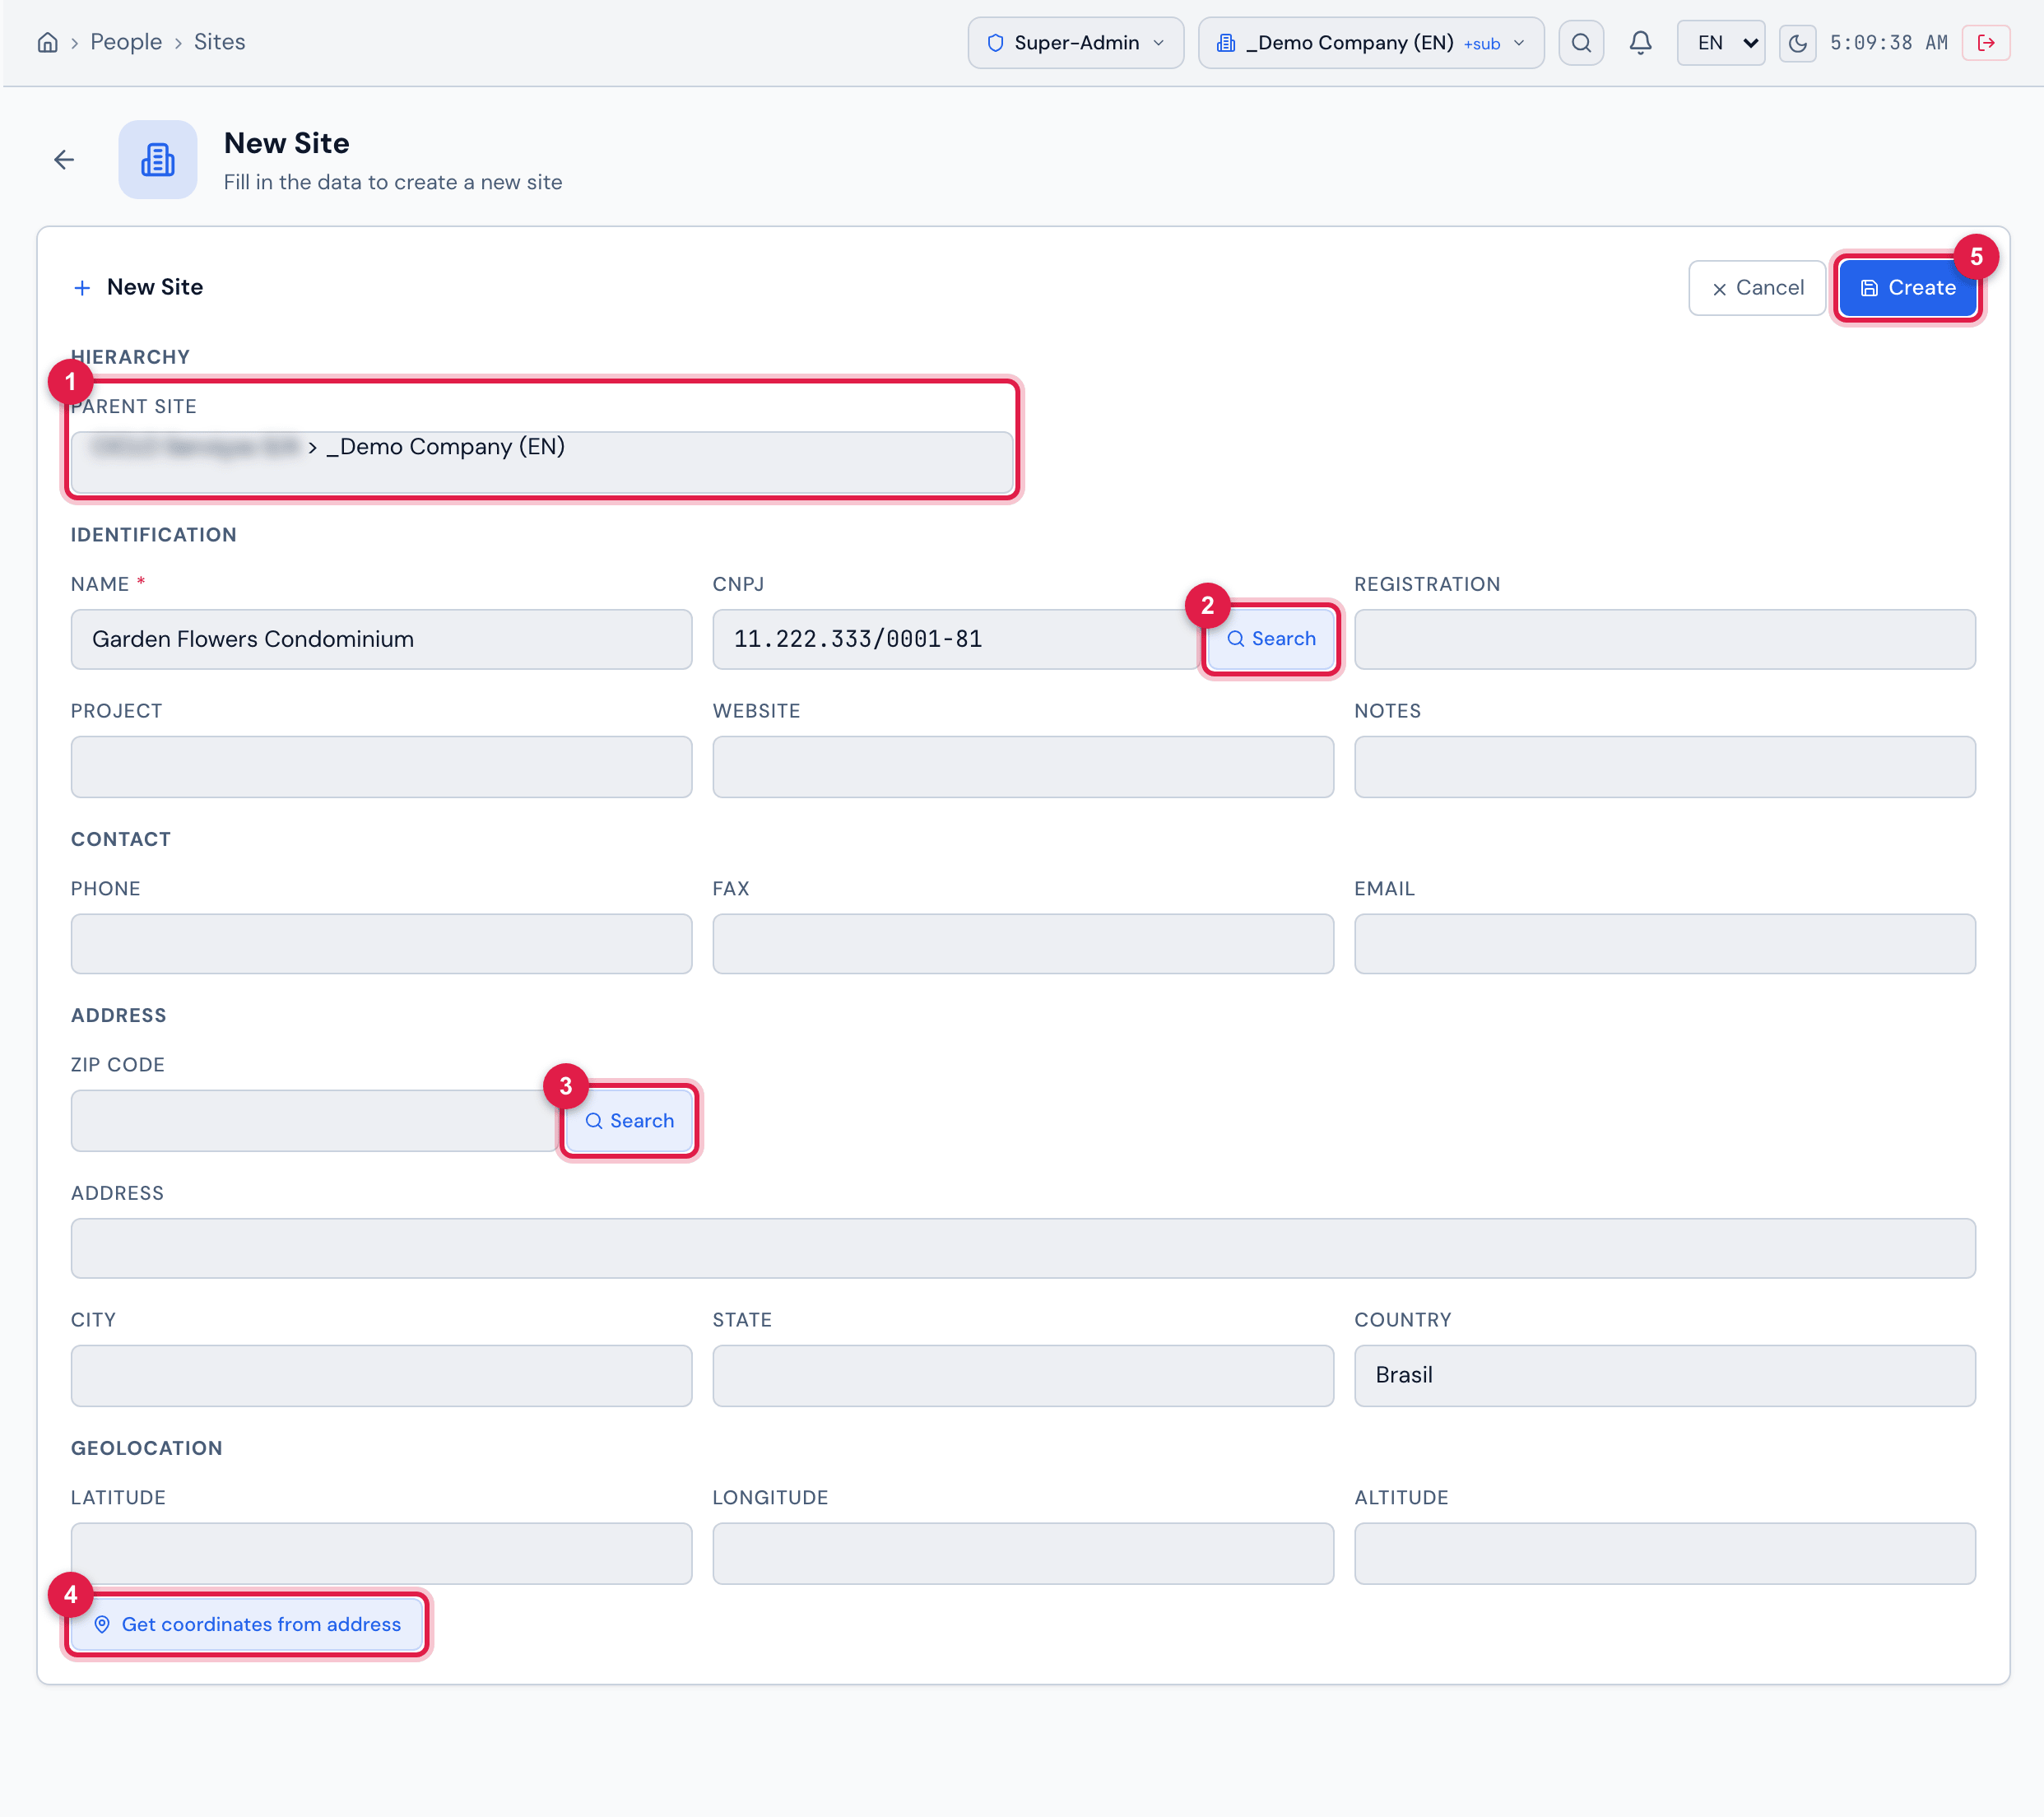
Figure 4. New Site page — “Fill in the data to create a new site” —, with the Hierarchy, Identification, Contact, Address and Geolocation sections and the Cancel and Create buttons.
- 1Parent Site — where the new site goes in the tree. It cannot be changed later (chapter 7).
- 2Search next to the CNPJ — fills in name, address, ZIP code, city, state, phone and e-mail from the public CNPJ data.
- 3Search next to the ZIP code — fills in address, city and state.
- 4Get coordinates from address — fills in latitude and longitude from the address.
- 5Create — saves the site.
| Section | Fields | Notes |
|---|---|---|
| Identification | Name (required), CNPJ, Registration, Project, Website, Notes | the CNPJ is formatted as you type; the Website is used by Fetch site logo (chapter 5) |
| Contact | Phone, Fax, Email | the e-mail must have a valid format |
| Address | ZIP Code, Address, City, State, Country | Country comes filled with “Brasil”. Without an address, the site does not appear on the app Sites screen (chapter 8) |
| Geolocation | Latitude, Longitude, Altitude | with latitude and longitude, the record shows the map, the site enters the Dashboard map and the weather of the Daily Reports of the site’s projects uses the exact point (without them, it uses the city) |
- The CNPJ Search needs the 14 digits (otherwise: CNPJ must have 14 digits). It does not replace the Name, Phone or Email you have already typed; the address, ZIP code, city and state are always replaced by those of the CNPJ record.
- The ZIP code Search needs the 8 digits (otherwise: ZIP code must have 8 digits).
- Get coordinates from address searches by the address with the city, then by the city with the state and, finally, by the ZIP code. With nothing filled in, it warns Fill in the address. Check the point on the record map after saving: the search may find the city center instead of the building.
- The three searches query public services on the internet; if one of them is down, fill in the fields by hand.
New Sub-site
Section titled “New Sub-site”To create a site directly below another one, without choosing the parent:
- Open the record of the parent site and click the Sub-sites tab.
- Click New Sub-site.
- Type the Name and, if you wish, the CNPJ (the magnifier next to it fills in the name from the CNPJ, if the name is empty).
- Click Create. Sub-site created appears and the list of the tab is refreshed.
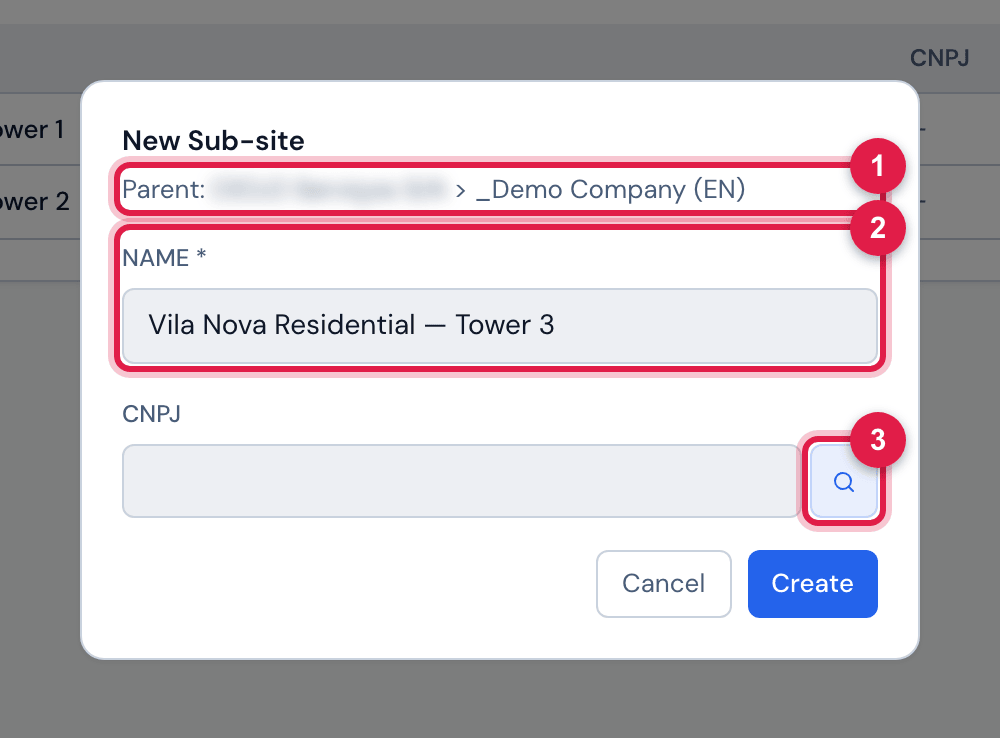
Figure 5. New Sub-site window open on the Sub-sites tab of the record: the Parent already set (the full name of the record’s site), the Name and CNPJ fields and the Cancel and Create buttons.
- 1Parent — the record’s site; the sub-site is created below it.
- 2Name — required; Create is only enabled with the name filled in.
- 3CNPJ magnifier — brings the company name from the CNPJ.
The sub-site is created with only the name and CNPJ. To complete address, contact and coordinates, open its record (click its row on the Sub-sites tab) and use Edit (chapter 7).
Was this page helpful?
Thanks for the feedback!
Got it — we will improve this page.