
Creating a project
Manual — Projects · chapter 3 of 13
In Operations › Projects, click New. The New Project screen has three blocks — Project Data, Classification and Schedule — and saves with the New Project button, at the top right. Only Name and Site are required; the rest can be filled in later, in Edit (chapter 4).The fields
Section titled “The fields”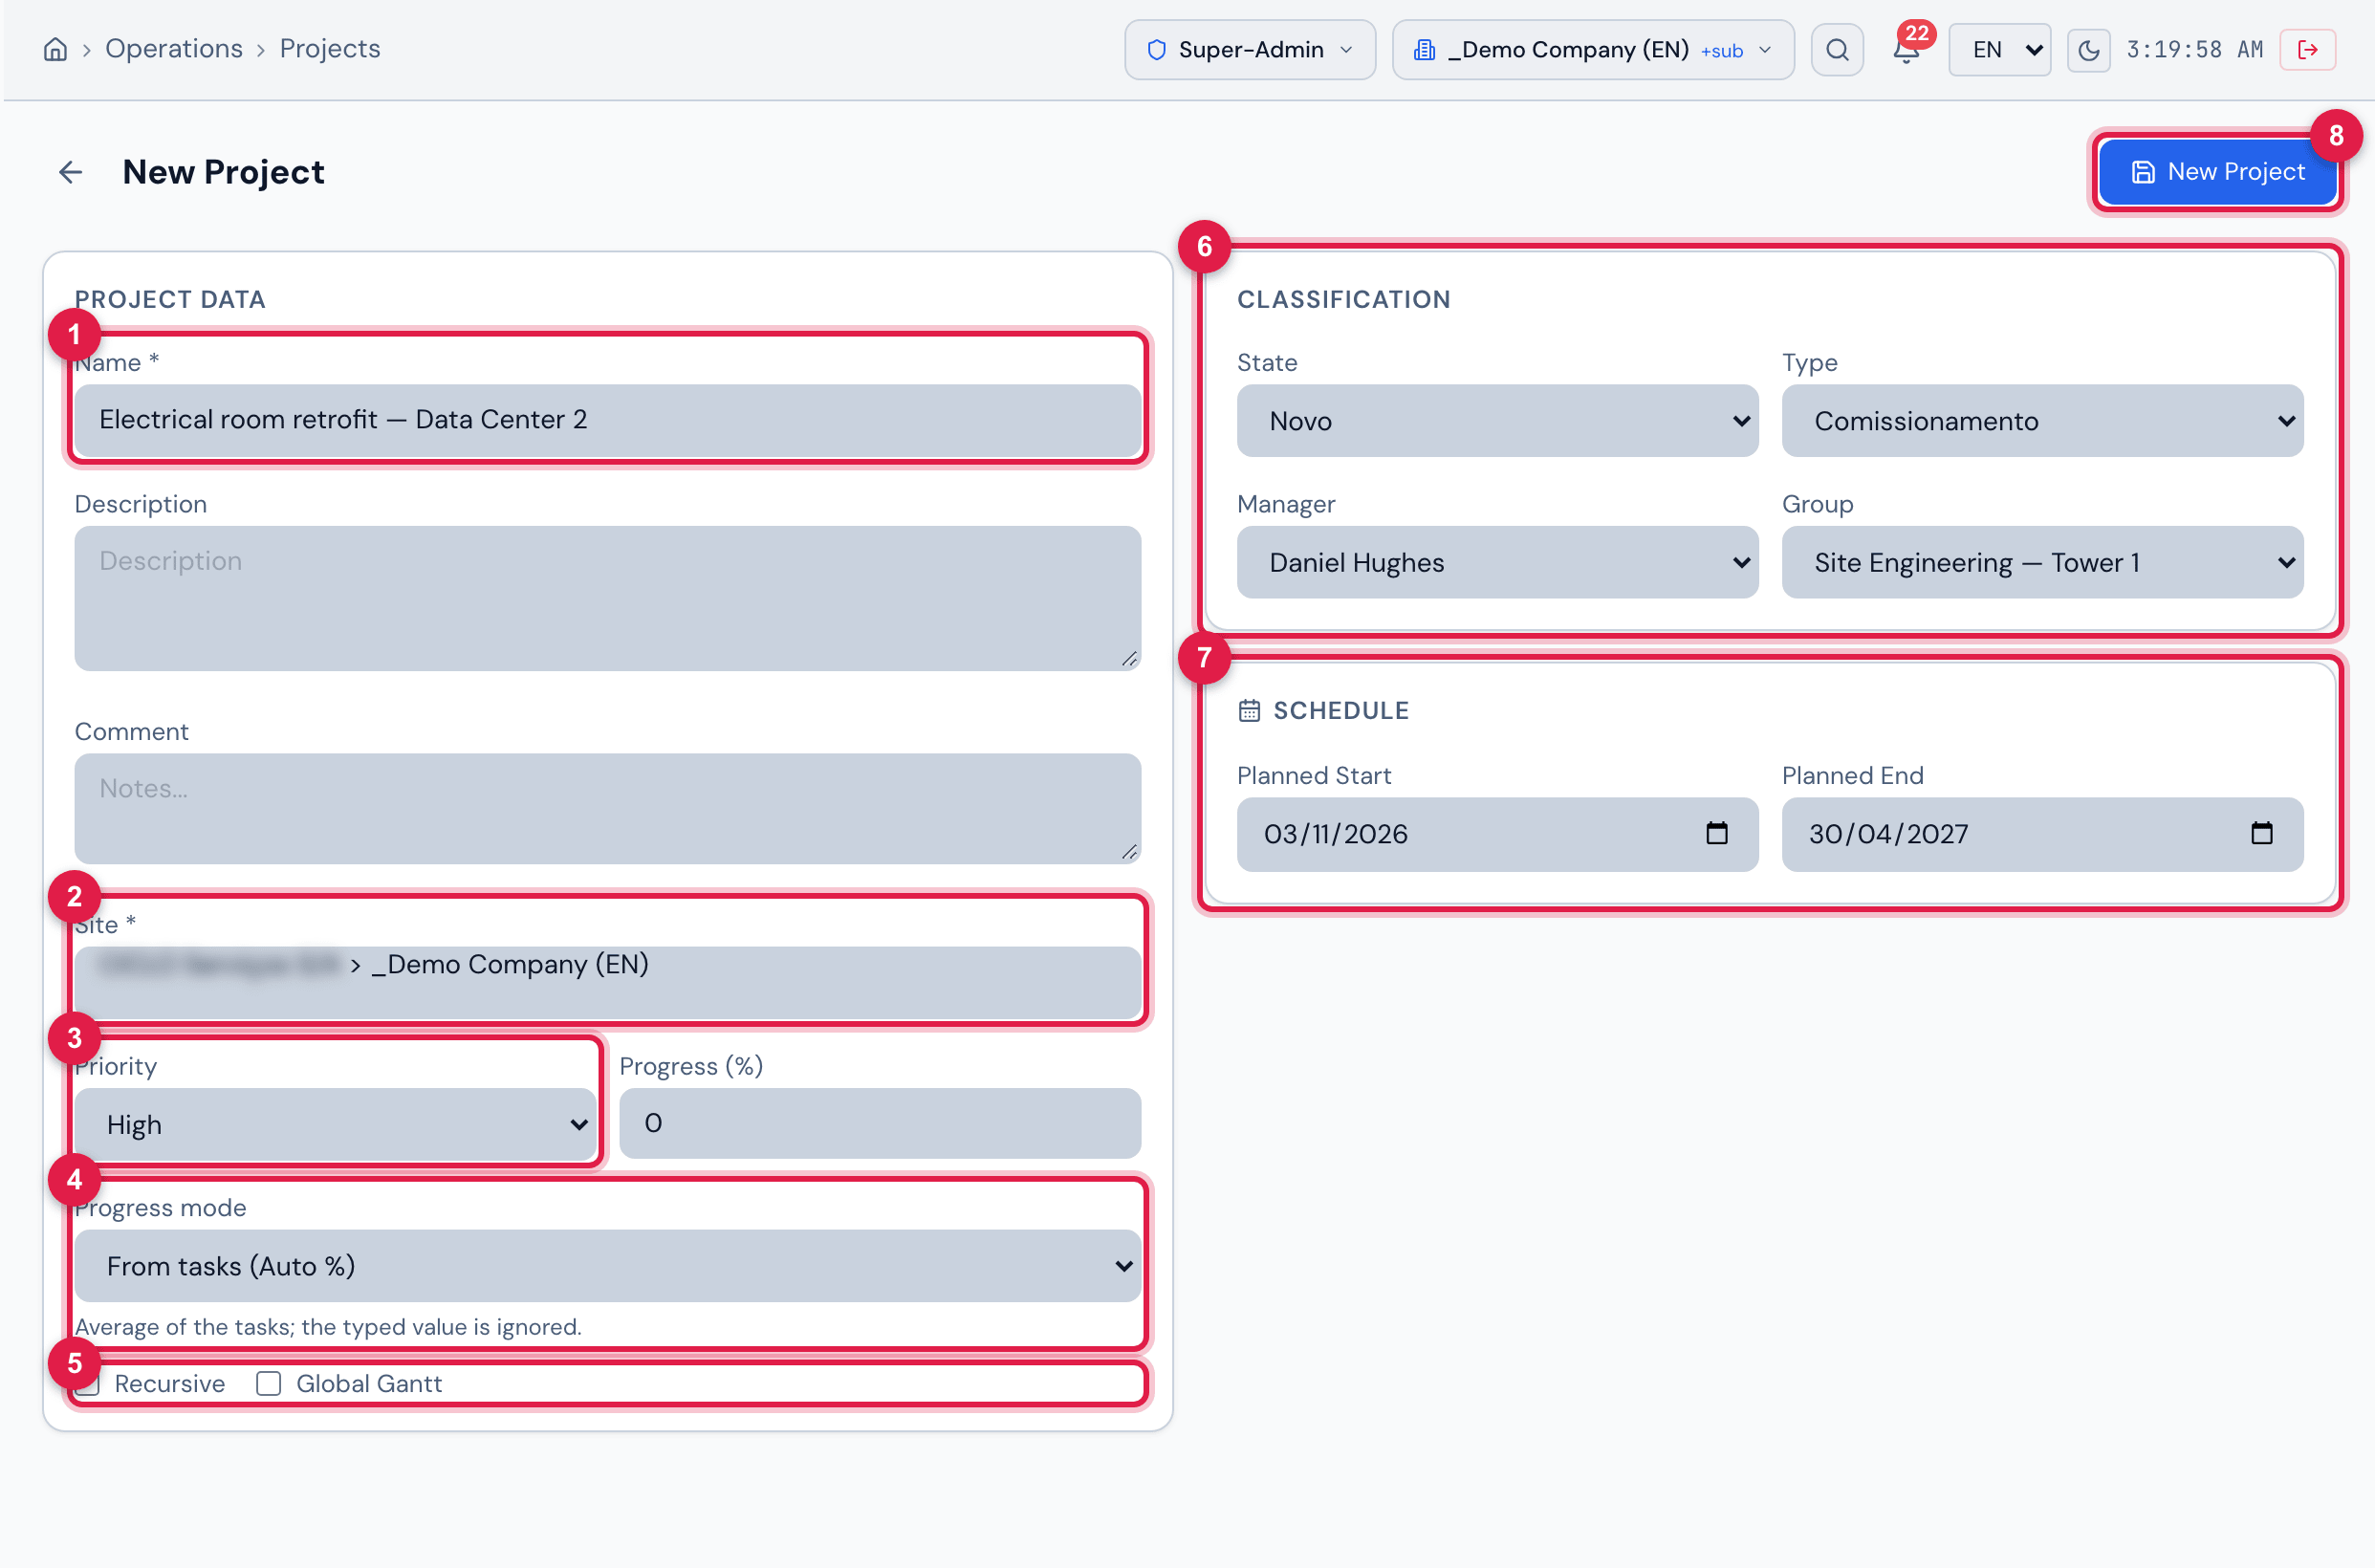
Figure 5. New Project: Project Data on the left; Classification and Schedule on the right; the New Project button saves.
- 1Name (required) — e.g. “Vila Nova Residential — Tower 1” or “Electrical room retrofit — Data Center 2”.
- 2Site (required) — where the project lives; it defines who sees it (chapter 1).
- 3Priority — from Very low to Critical; the default is Medium.
- 4Progress mode — Manual, From tasks or From schedule (below).
- 5Recursive and Global Gantt.
- 6State, Type, Manager and Group.
- 7Planned Start and Planned End.
- 8New Project — saves and opens the project page.
| Field | What it is for |
|---|---|
| Name (required) | how the project appears throughout H2O and in the app. |
| Description / Comment | free texts. The list search looks in them too. |
| Site (required) | the site (job site, building, data center) of the project. The tasks created in the project inherit this site. |
| Priority | Very low, Low, Medium, High, Very high or Critical. It appears on the project page and in the app. |
| Progress (%) | the typed % — it only counts in Manual mode; in the other modes the field is locked. |
| Progress mode | how the project % is obtained (table below). |
| Recursive | the project also applies to the sites below the chosen site: a profile of a child site reaches the project. |
| Global Gantt | marks the project for a general Gantt of projects. Today no H2O screen uses this mark; it stays recorded for when there is one. |
| State | the situation of the project, from the environment’s state catalog. A state marked as finished makes the project page stop showing Overdue and hides the Expected progress. |
| Type | the classification of the project, from the environment’s type catalog (for example, building, substation, commissioning). |
| Manager | the person in charge. In the app, only the manager and the members of the project Group open the Audit tab (chapter 11). |
| Group | the managing group of the project (in the app it appears as Manager group). |
| Planned Start / Planned End | the deadline. Without both dates there is no Expected progress, no Overdue filter and no From schedule mode. |
Progress modes
Section titled “Progress modes”| Mode | How the % is obtained | When to use it |
|---|---|---|
| Manual | the value typed in Progress (%). | when progress is measured outside H2O (physical measurement, the client’s spreadsheet). |
| From tasks (Auto %) | the average % of the top-level tasks; a parent task, in turn, is the average of its subtasks. It is recalculated whenever a task is created, edited or deleted (project page, Gantt, app, Kanban). | when the schedule in H2O is the reference and the team updates the % of the tasks. |
| From schedule | the fraction of calendar days between the Planned Start and the Planned End up to today: 0% before the start, 100% after the end. It changes by itself every day. | fixed-term contracts, maintenance shutdowns, when what matters is the elapsed time. |
- The value typed in Progress (%) is ignored in the From tasks and From schedule modes — the hint below the field says so.
- In From tasks mode, creating or deleting a task already recalculates the project %; Auto-Calc is not needed for that.
- The mode can be changed at any time in Edit (chapter 4).
After saving
Section titled “After saving”- Created — Project “…” created appears and the project page opens (chapter 4).
- H2O records the creation in the history, fires the notifications configured for projects and tells the app.
- For the project to appear in someone’s app, the person (or one of their groups) must join the Team (chapter 5).
- Check the site in the header and open Operations › Projects › New.
- Fill in Name and Site; choose the Progress mode.
- Fill in State, Manager and the planned dates.
- Click New Project.
- On the project page, build the Team (chapter 5) and the Tasks (chapter 6).
Was this page helpful?
Thanks for the feedback!
Got it — we will improve this page.