
Help, tour and support
Manual — Getting started — web · chapter 10 of 13
There are three kinds of help inside H2O itself: the help button on each page, the guided tour of the screen and Support, to talk to the ATG team.The help button
Section titled “The help button”The round button with ?, in the bottom right corner, opens the help panel for the page you are on. It is half transparent so it does not get in the way of reading, and it lights up when you hover over it. Shortcut: Ctrl + / (on a Mac, ⌘ + /) opens and closes it; Esc closes it.
- Search help… field — searches the questions of all modules.
- Tip — a quick tip for the page.
- Frequently Asked Questions — the questions for the page’s module.
- Full manual — opens, in a new tab, the chapter of this site about the page. It only appears on pages that already have a published chapter.
- Quick Tips and All Modules — the tips for the page and the help for the other modules.
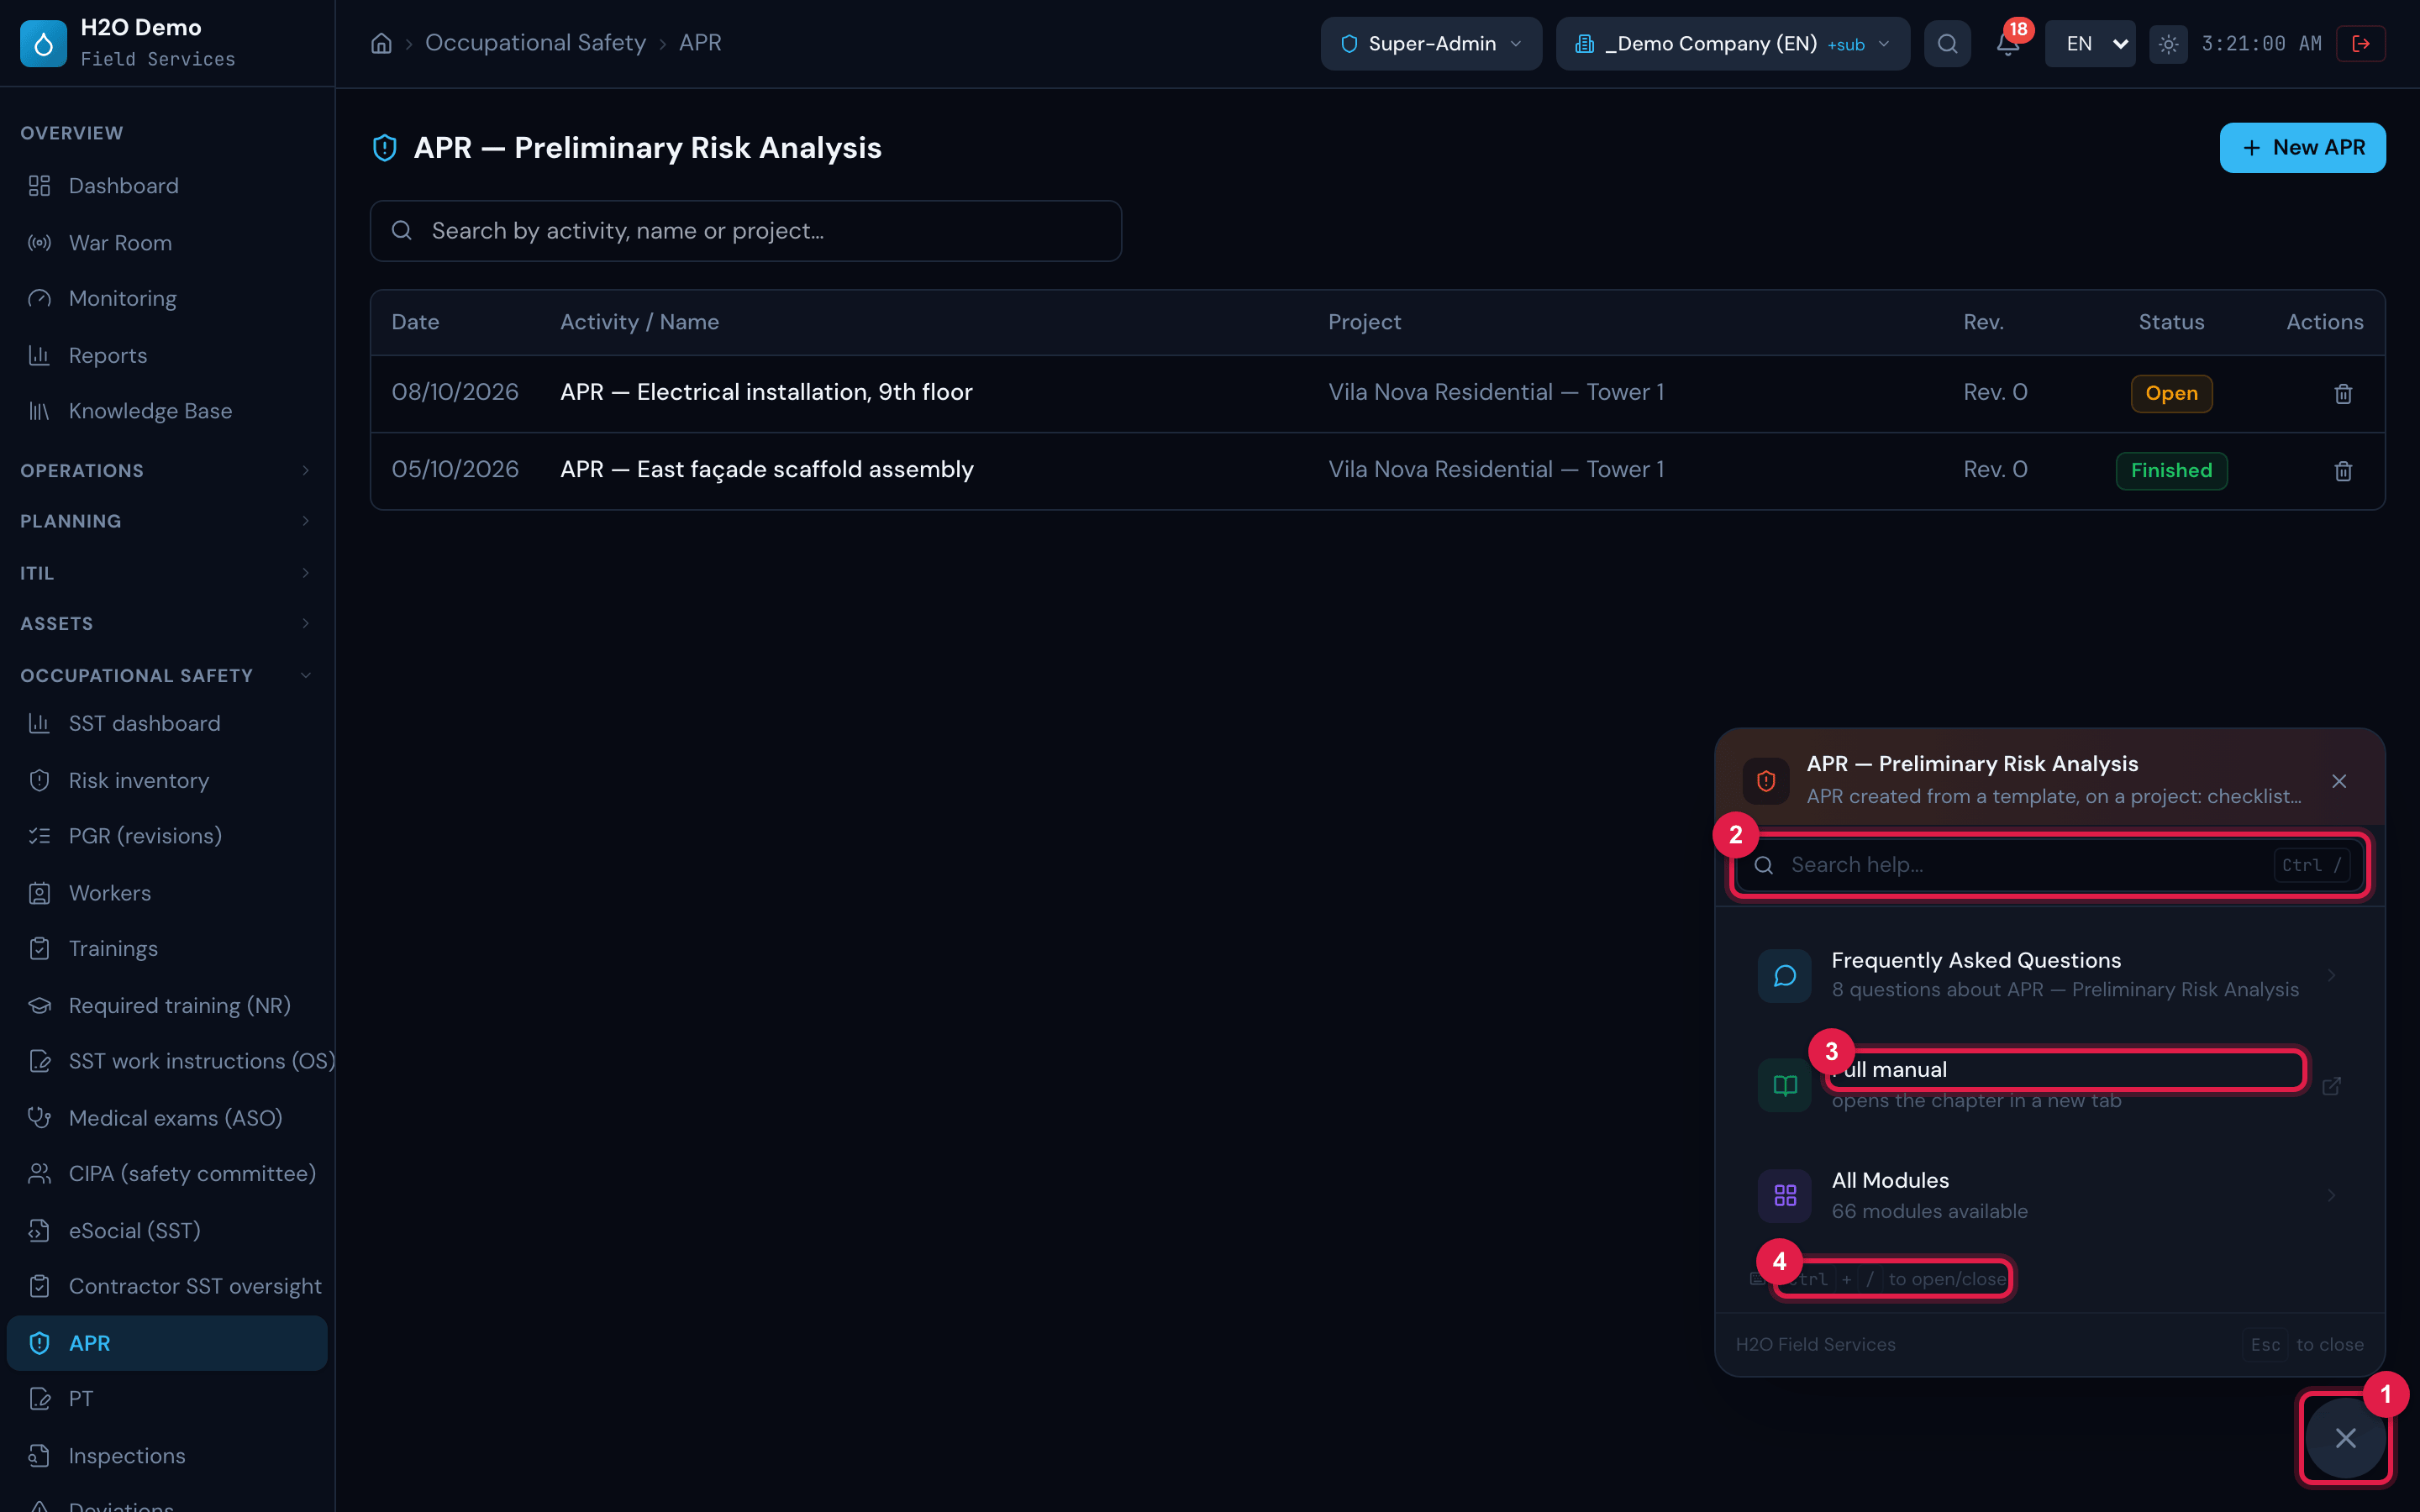
Figure 22. The help panel open on the APR — Preliminary Risk Analysis page (Occupational Safety module): the Search help… field, Frequently Asked Questions, Full manual, All Modules and the reminder of the Ctrl + / shortcut. This page has no Tip and no Quick Tips.
- 1Help button (when open, it turns into an X).
- 2Help search.
- 3Full manual — opens the manual chapter in a new tab.
- 4Ctrl + / shortcut.
The platform tour
Section titled “The platform tour”On the first access, H2O shows the Welcome to H2O! window, which asks Which language do you prefer? (Português, English, Español). Start tour → saves the chosen language in your profile and starts the tour; Skip tour also saves the language and closes the window, without the tour.
The tour lights up, one by one, the parts of the screen — side menu, navigation by modules, site switching, global search, notifications, knowledge base, help button, My Profile and Support —, only those your profile sees. Use Next →, ← Back and ✓ Done; clicking outside the balloon also moves forward, and the X ends it. In the self-service portal, the tour shows the portal tabs.
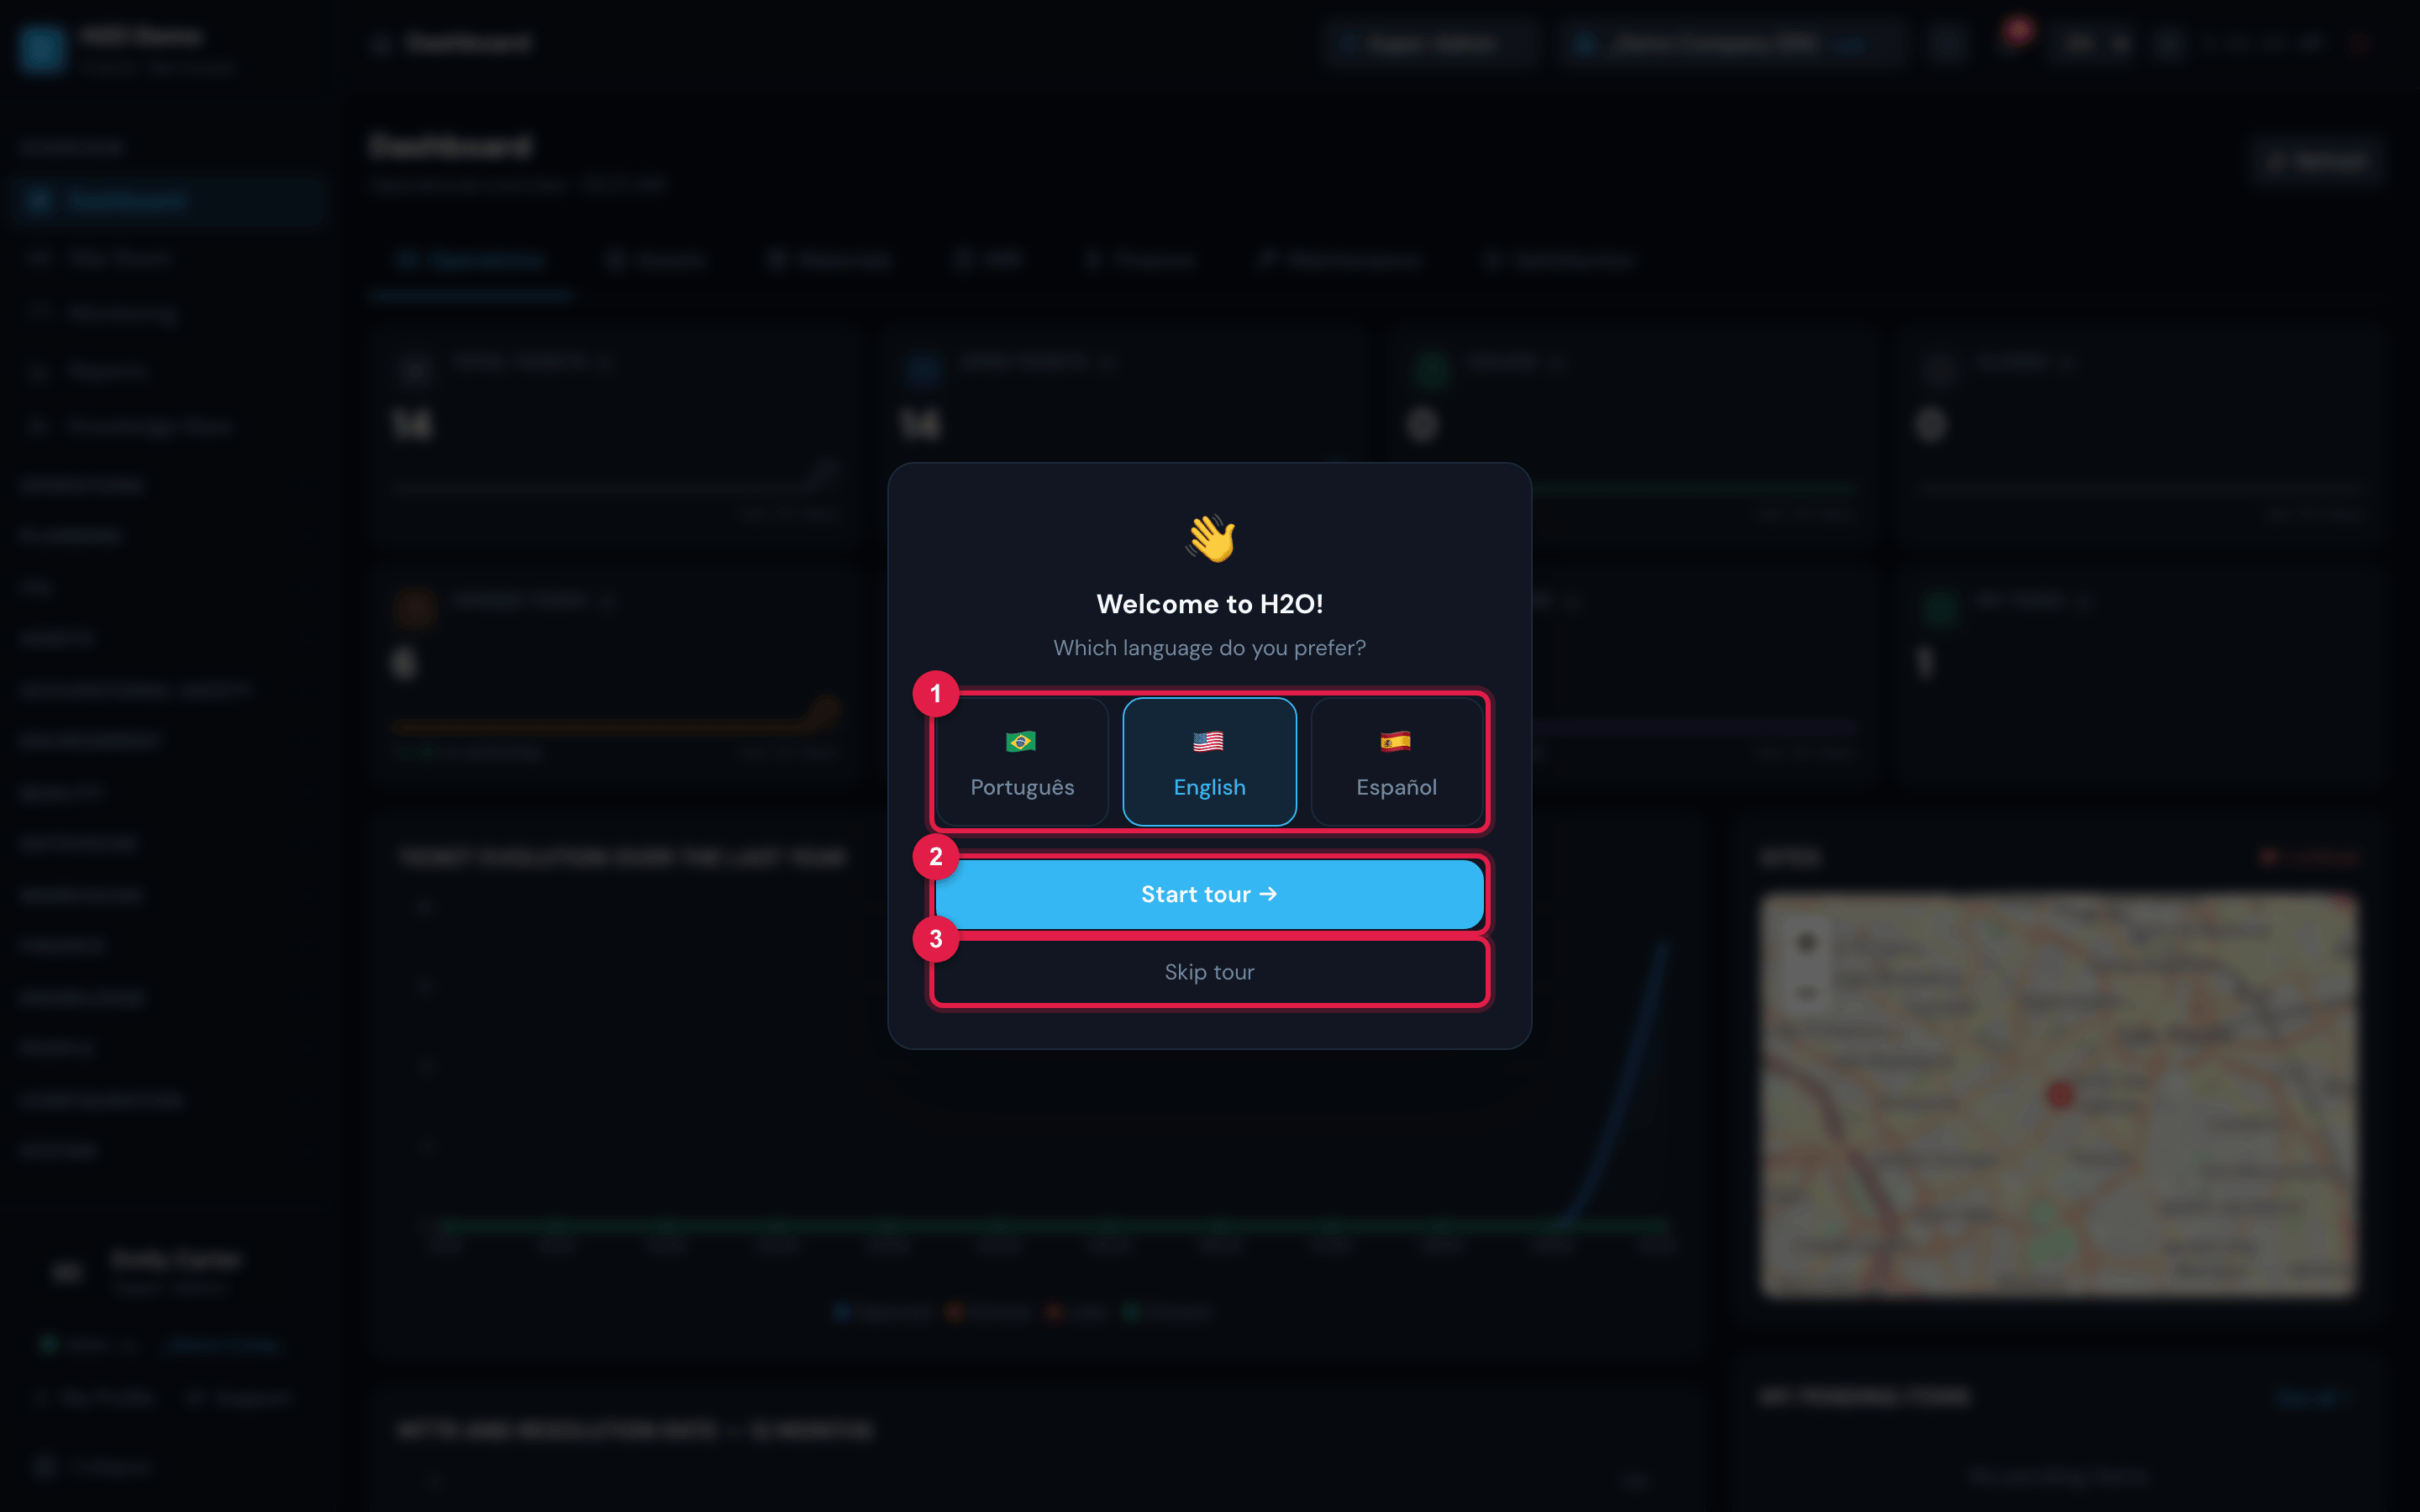
Figure 23. The Welcome to H2O! window of the first access: the question Which language do you prefer?, the language buttons, Start tour → and Skip tour.
- 1Language choice.
- 2Start tour →
- 3Skip tour
Support & Feedback
Section titled “Support & Feedback”The Support button, on the user card (bottom of the menu) — or the Support tab, in the self-service portal —, opens the Support & Feedback window. It is the channel to the ATG team, which develops H2O: use it to report a system error, suggest an improvement or give a compliment. A problem with a piece of equipment or a service at your site is a ticket, not support.
- Click Support. The window lists your conversations (the 20 most recent).
- Click New feedback.
- Choose the category: Suggestion, Bug, Compliment or Other (Bug comes selected).
- Describe it in Describe your suggestion, problem or compliment… — from 10 to 2000 characters; the counter at the bottom turns green when the text can be sent.
- If you want, click 📎 Attach screen context (URL + time): H2O attaches an image with the page address and the time (it is not a screenshot).
- Click Send. The message also carries the address of the page you were on.
The team’s reply appears in the conversation, signed H2O Support, and the bell shows Reply from H2O Support. To reply, open the conversation, write in Reply… and, if needed, attach an image or a PDF.
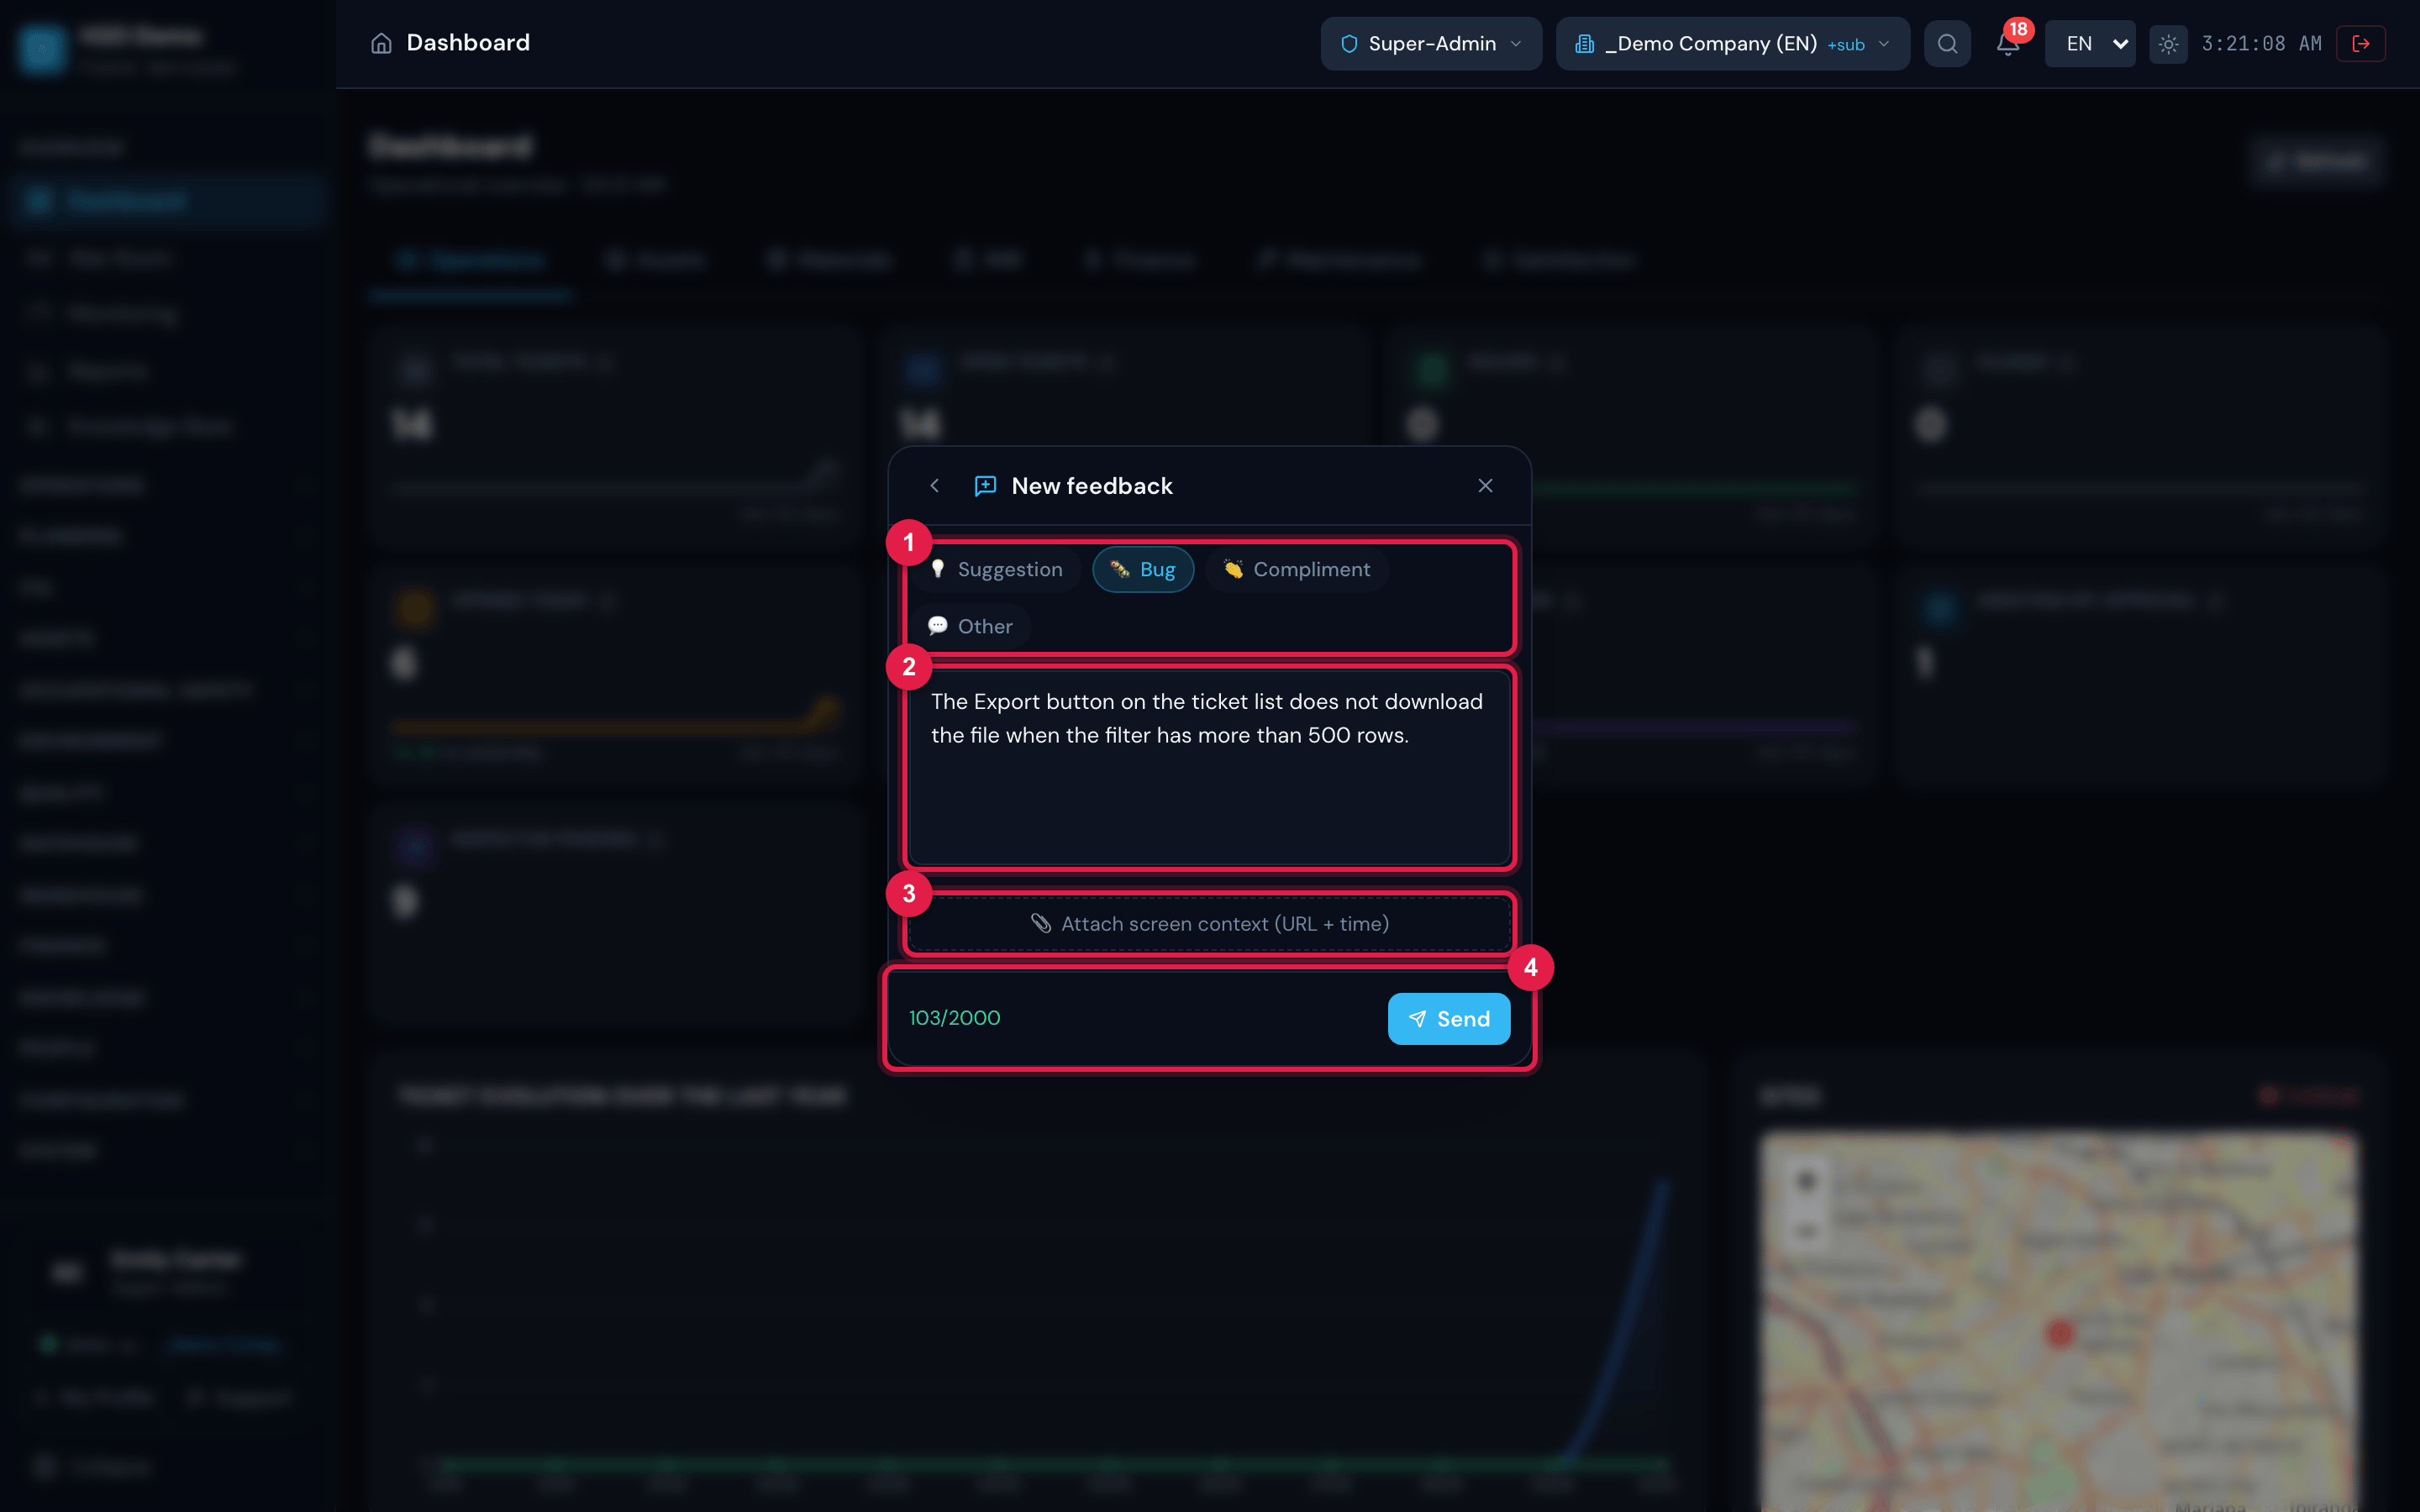
Figure 24. The Support & Feedback window in New feedback: the categories (Suggestion, Bug, Compliment, Other), the message field, 📎 Attach screen context (URL + time), the character counter and Send.
- 1Message category.
- 2Text — minimum of 10 characters.
- 3📎 Attach screen context (URL + time).
- 4Counter and Send.
Was this page helpful?
Thanks for the feedback!
Got it — we will improve this page.